DIY Leather Pulls
If you had a chance to read yesterday’s post you’ve already seen the leather pulls we used on the boho chic inspired media cabinet for Hawk’s Ridge. My baby sister had pinned similar pulls months ago but we just couldn’t seem to find the right piece for those statement making pulls. I kept them in the back of my mind though because she wanted to use them so bad. It wasn’t until I looked at the office console cabinet with fresh eyes that I knew those leather pulls would be the perfect compliment. I also knew we could make our own and save a little bit of money for other projects we’re working on. Here’s a look at how we created DIY Leather Pulls and how you can too…

The original pulls my sister found were $15.00 each. While that’s not a bad price for leather pulls we needed 6 for each panel of the cabinet which would mean spending $90 on hardware. Yes, totally doable but here’s the kicker, the doors are bifold which means the leather pulls would be for decorative purposes only. With that in mind, $90 seemed like a lot of money so I told her we would do our best to recreate the look she wanted at a more budget friendly price. I enlisted my bestie S, who has such a gift for problem solving and headed for our local craft store. There we found a piece of leather that was the color and thickness my sister wanted.

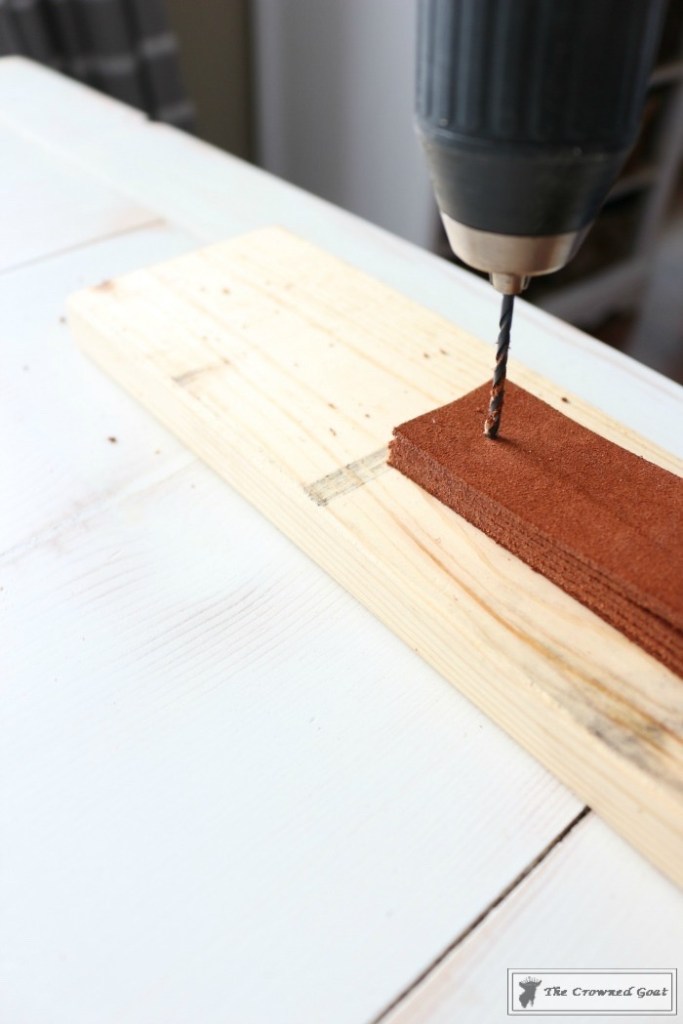
We cut the straps to straps to pull size then used a small drill bit to make two holes (one at each end of the leather.) As always, use caution, care and all necessary safety precautions when you’re using glue, power tools and all other sharp tools you’ll see in the following photos.
Once we had the holes drilled, we use a measuring device to make sure the leather strap was placed where we wanted it on the cabinet.
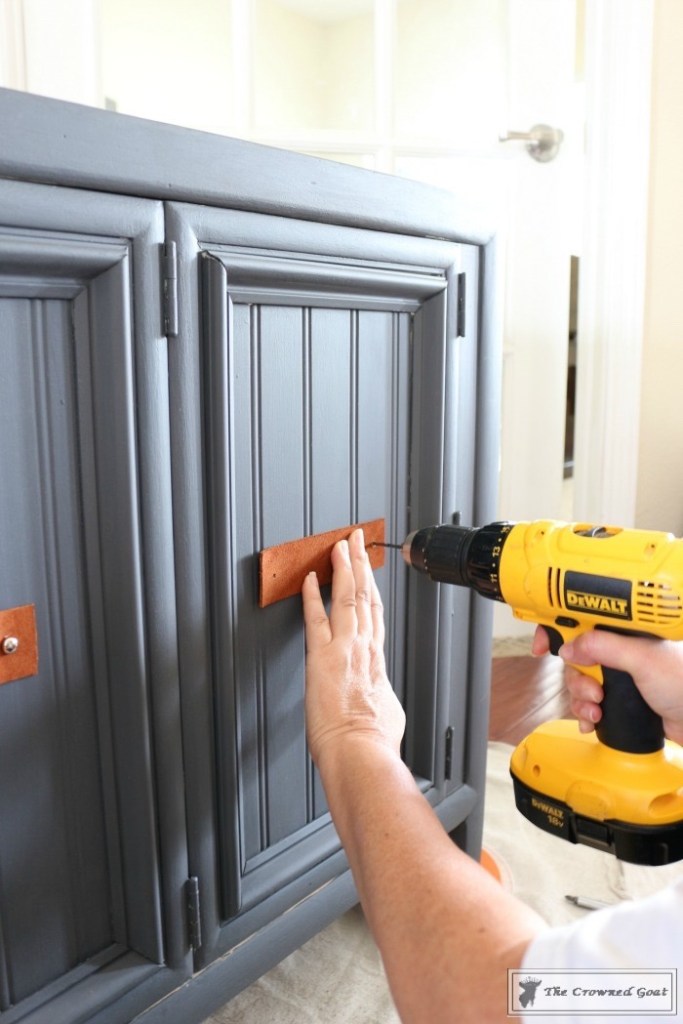
Then we used the drill and a larger drill bit to place screws into the leather strap securing it to the cabinet.

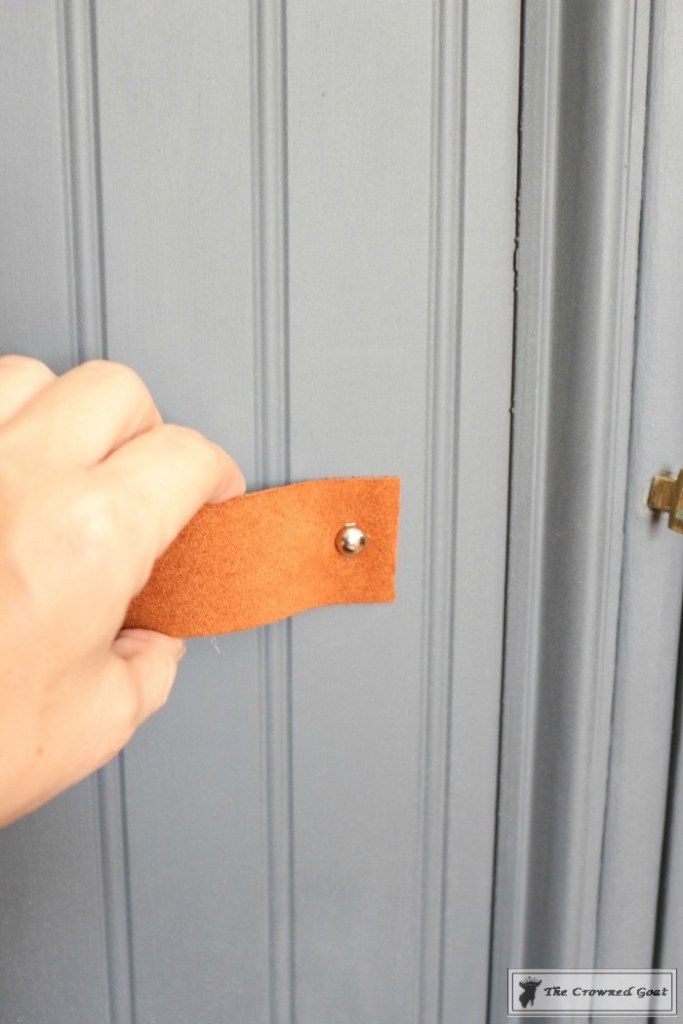
In an effort to give the leather pull a more finished look, we found silver caps in the beading and leather section of the craft supply store to place over the screws.

The caps came with prongs though so we had to cut each prong off first. Pliers and caps are both very sharp so use caution and care when performing this step.

After we removed the prongs from the cap, we used E6000 to glue the cap and cover each screw.
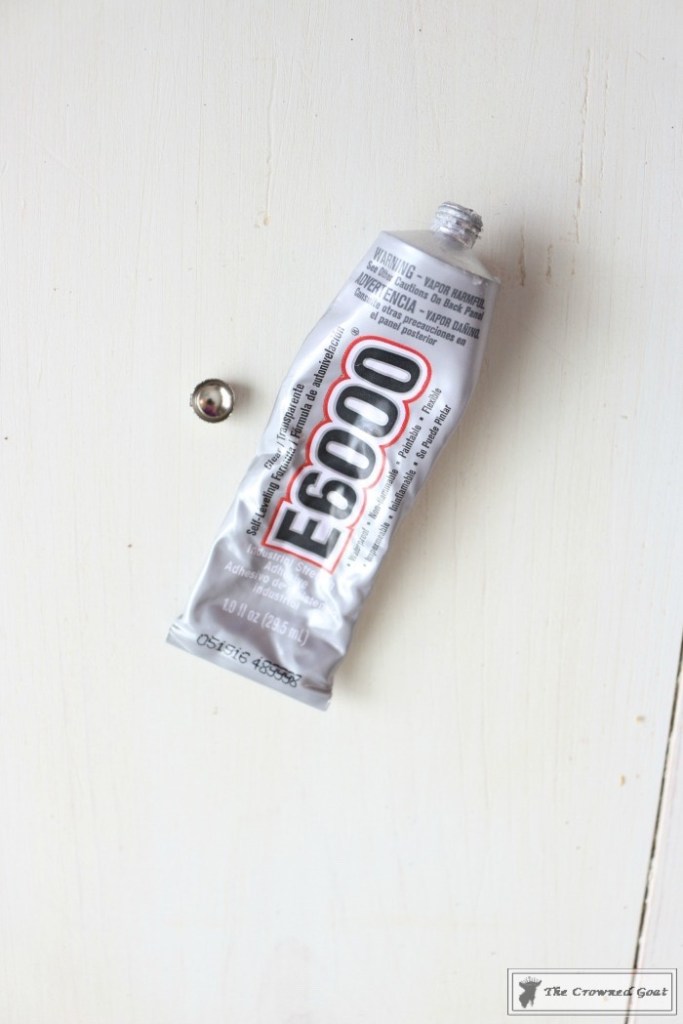
Allow to dry the E6000 to dry completely before handling.

I would love to say it was my rock star paint job that look cabinet from this…

To this…

But in all honesty, it was those leather pulls LiLi picked out

and S problem solved that made all the difference.

Keep in mind we used these pulls on the media cabinet as purely decorative. You would need to take a few extra steps to make them functional depending on your specific piece of furniture. For us, this was a way to get the look we wanted for way less. In fact, we were able to make each pull for less than $3 each. So exciting, right?
See you guys back here tomorrow. Since we’ve been talking all things office this week, I’ll share The Busy Girl’s Guide to thank you notes and personalized stationery. Until then, I’ll see you on Instagram, Facebook and Pinterest.
Many blessings,
CoCo


You and S make a great team! These leather pulls were a perfect solution for your sisters beautiful cabinet.
We appreciate you ladies, thank you so much! Hugs, CoCo