One Easy Update for a Simple Chandelier
I know I was supposed to share a few changes in our breakfast nook today but you guys, I got completely distracted by the light hanging over the breakfast table. We bought it from Ballard Designs a few years ago and it’s holding up really well. The finish is an oiled rubbed bronze which we now have on all of the hardware in the kitchen. We loved the light so much we bought the same style but the larger size for the dining room. The light is a classic one that doesn’t compete with the almost 9-foot china cabinet which is nice.

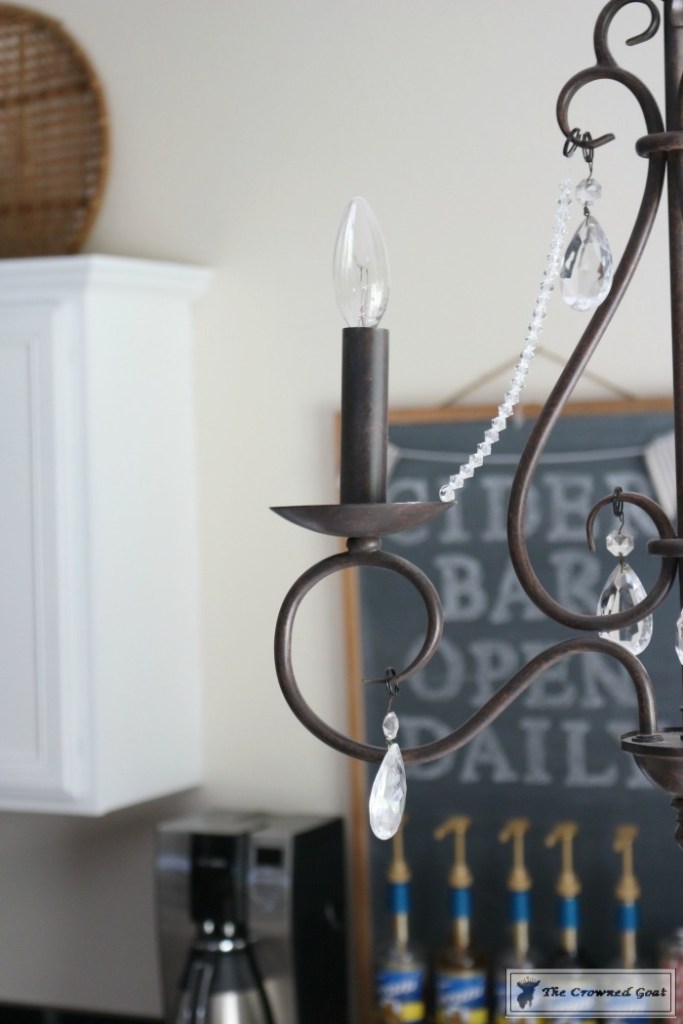
While I was changing up a few things in the kitchen and breakfast nook, I stepped back to look at what I thought was going to be the finished space. My mom tells me all the time, “you’ll know it’s finished when you don’t feel like tweaking it anymore.” Don’t get me wrong the light worked well in the space but there was always something about it that made me feel like it needed…I don’t know something a little extra. Does that make sense? Here’s a look at the light in its current state…

Again, not bad, it just needs a little something. Ballard Designs sells magnetic crystals at $39 and chains at $49 for a set of three. Given I needed 9 crystals plus 3 chains it would mean paying almost $170 just for crystals. Throughout this process, we’ve tried amazingly hard to keep the kitchen makeover very budget friendly and I wanted to keep the breakfast area updates the same way. With this in mind, I went to the craft supply store in search of an easy update for a simple chandelier. Here’s a look at how you can achieve this look too…

SUPPLIES: (Affiliate links have been provided for your convenience. You can find further information on our disclosure policy here )
Basic Chandelier (You can sometimes find basic and inexpensive chandeliers at thrift stores, charity shops, restores and antique malls so make sure to check them frequently)
Crystals (I’m using antique crystals but you can find a similar style online here. Keep in mind the amount of crystals you need will depend on the size of your chandelier.
Crystal Chains (I bought these at my local craft supply store but you can find similar crystal chains here). Keep in mind the length of crystal chain you need will depend on the size of your chandelier.
Round Split Rings or Jump rings (I bought spilt rings at my craft supply store because my crystals were on string but you can find similar here or you can find jump rings here). Be sure to buy the appropriate sized ring based on the size/circumference of the arms on your chandelier and the materials holding/stringing your crystal chain together
Spray Paint (Choose the color spray paint that most closely resembles the color of your chandelier. I chose an oiled bronze color spray paint which you can find at your local craft supply store or online here)
Non-flammable Glue that Specifically Bonds to Metal or use an Epoxy that will bond to metal
STEPS:
Make sure your chandelier and all of the lights have been well cleaned and are free from dust, dirt and debris.

Before you get started with the actual project make sure you have all of the materials you need. I rearranged the design a few times, taping things down before I secured anything in place. This “trial run” will save you time. Take a picture of your finished “trial” look before you take all of the crystals down so you won’t forget where you want to place everything.

Once you’re ready to get started, spray split rings (front and back) with desired color spray paint.

Allow to dry completely.

Wrap clear thread from the crystal chain in between the thread of the split ring. It should be tight and secure enough to hold the weight of the crystals chain.

Hang crystal chains, securing in place with glue or epoxy.

Once all of the crystal chains have been secured, begin prepping the crystal drops by threading the hook from the crystal to the split ring.

Hang crystal drops on the light by sliding the split rings through the “hooks” on the light.

Be extra careful as you’re placing the crystal drops on the light because you don’t want to disrupt or alter the drying process of the crystal chains. I plan to let the chandelier rest at least 72 hours prior to handling or moving it.
Gently wipe fingerprints off crystal drops with damp cloth.

I’ll definitely keep you guys posted on how this light holds up. I don’t know why I’m so surprised at how different the light looks with the addition of the crystals but it makes a huge difference. I like the mix of the new crystal chains with the old antique crystal drops too. It adds a fun layered feel and a bit of eye candy to the breakfast nook. I think I may finally be finished with this space!

See you guys back here tomorrow.There have been some gorgeous fall home tours this week that I can’t wait to share with you. Until then, I’ll see you Instagram, Facebook and Pinterest.
Many blessings,
CoCo


Hey CoCo – What a beautiful transformation! Your chandelier has just the right amount of bling – the updated look is so pretty. Thanks so much for sharing the tutorial – great job!
You guys are the best cheerleaders, thank you so much for all of your sweet words! Hugs, CoCo
I liked the way your chandelier looked before but the crystals really made it special. I have a very similar chandy in our living room that needs an update like this. Thanks for the inspiration!
I appreciate it, Amy! I think the layered mix of the new strands with the antique crystals really helped to jazz it up. It finally looks like it belongs next to the kitchen he he. Can’t wait to see what you do with yours. Big hugs, CoCo