Hungry Hippies and DIY Stamped Sandwich Wrap
Today, we’re sharing a recipe for one of our favorite sandwiches, the Hungry Hippies, and an easy way you can personalize your next picnic with a DIY Stamped Sandwich Wrap.
Are you guys enjoying all things summer yet? I hope so! We’ve been trying to soak up every ounce of summer we can too.
This past weekend felt kind of nostalgic because it was filled with quintessential summertime fun starting with pizzas from the pizza oven and ending with a sunset picnic at the beach. We also traveled to Loblolly Manor to hang out with my family at a luncheon they hosted that my Dad dubbed, “The Seventh Inning Stretch.”

This casual lunch included a family baseball game with all the “fixins” (think peanuts, cracker jacks, licorice whips, and Big League Chew bubble gum snuggled amongst tables of food, patriotic flower arrangements, and of course baseballs.

It’s definitely going to go down as one of my favorite memories of the year. After we got home from Loblolly, we decided to end the long weekend with Hungry Hippies and a sunset picnic at the beach. With so many people in our family we’re always looking to personalize things, so we decided to try our hand at stamping our own sandwich wrap and it was crazy easy.

Here’s a look at what you’ll need to customize your own sandwich wraps and my Mom’s recipe for Hungry Hippies…
Supplies Needed to Complete DIY Stamped Sandwich Wrap:
- Quality Ink Pads in the Color of Your Choice
- Wooden Stamps
- Parchment Paper
- Ribbon in the Color of Your Choice
- Cheap Hairspray (optional)
Steps Needed to Complete DIY Stamped Sandwich Wrap:
Step 1 – You’ll need a sheet of parchment paper that is long enough to wrap your Hungry Hippie or whatever sandwich you like best. Lay the parchment paper flat on a hard surface and get ready to stamp!

Step 2 – We tried two different kinds of ink and I’ll just be honest, the higher quality ink pad ($6.99-$9.99) was SO MUCH BETTER than the $2.99 ink pad we tried. I’ll show you what the lower quality ink first. I used a patriotic theme and stamped my bestie S’s DIY Sandwich Wrap with blue and red ink using wooden letters for a monogram and the numbers 1776.
If you’ve never stamped parchment paper before, you place the wooden stamp directly onto the ink pad

followed directly onto the parchment paper making sure to press down firm enough to get a stamped imprint but not so firm that it smudges the ink.

Feel free to be as creative as you want to be! I just randomly added letters and numbers until I had covered a good bit of the paper. Keep in mind you’ll only stamp one side of the parchment paper. DO NOT stamp where the sandwich and ink could touch, as the ink is not food safe.

Step 3 – Allow the stamp ink on the parchment paper to completely dry before wrapping your Hungry Hippie. Depending on the quality of ink you’ve used on this project, you might need to “set” your stamped sandwich wrap with cheap hairspray so the ink doesn’t smudge. You can definitely see how the cheap ink pooled a bit on some of the letters.

Just to show you this idea can be used for more than just a picnic on a patriotic holiday, I decided to try a higher quality ink pad and make a DIY stamped sandwich wrap using goats and crowns.

The result is so much better, right?

Once your DIY stamped sandwich wrap is dry and good to go, you can start assembling the ingredients for your sandwiches. Here’s what you’ll need to make a Hungry Hippie…
Supplies to Make a Hungry Hippie Sandwich:
- Everything Bagel
- Hummus or Garden Vegetable Cream Cheese Spread
- Alfalfa Sprouts
- Ripe Tomato
- Avocado
- Havarti Cheese

Steps to Make a Hungry Hippie Sandwich:
Step 1 & 2 – Using caution and care as knife will be sharp, slice the everything bagel in half. Toast both halves of the bagel.

Step 3 – Spread either hummus or garden cream cheese on both halves of the bagel. Hummus is my personal favorite, but garden cream cheese is what we had on hand. It’s good both ways though.

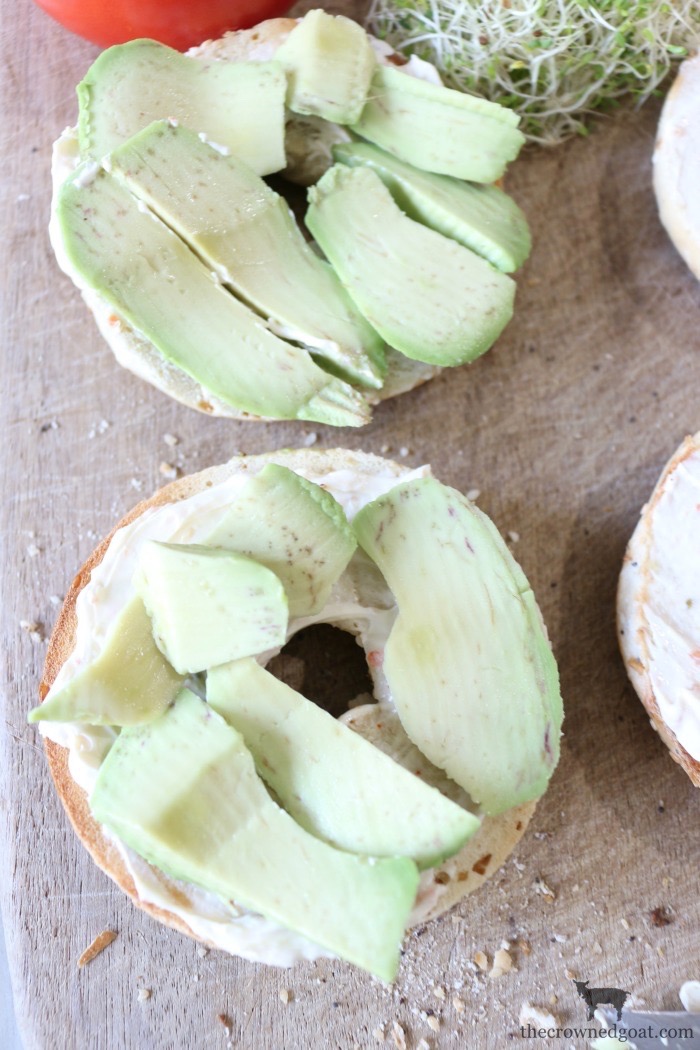
Step 4 – On one half of the bagel, layer sliced or mashed avocado.
Step 5 – Add alfalfa sprouts on top of the avocado.

Step 6 – Then a slice of tomato. Sprinkle a bit of salt and pepper over the tomato.

Step 7 – Layer a piece of Havarti cheese over the tomato.

Step 8 – Then using caution and care as oven will be hot, set oven to broil and melt the cheese.

Step 9 – Carefully, remove the half with the melted cheese as cheese, pan and oven will be hot and top with the other half of the bagel.

Step 10 – Allow the Hungry Hippie to cool just a bit before wrapping with your DIY Stamped Sandwich Wrap. Again, stamp ink is NOT food safe so make sure the ink and the Hungry Hippie don’t touch each other.

We usually pack these Hungry Hippies with chips, fruit, cheese and a cookie and either take them to the beach or eat them on the lawn at the fort while we’re waiting for the 4th of July fireworks.

We also make sure to pack lots of drinks to stay hydrated. I’ve been obsessed with this as of late. Oh, my word, it is SO good!

We’ve been savoring every ounce that summer has to offer this year, and I hope you have been too. These Hungry Hippies can be easily enjoyed on the beach, at the lake, the park or your favorite hiking trail.

In addition, personalizing each sandwich by making your own DIY Stamped Sandwich Wrap is just another easy way to make the time you spend with friends and family feel extra special. I hope you’ll try it and let us know what you think!
Until next time, I’ll see you on Instagram, Facebook and Pinterest.
Many blessings,
CoCo


Love this! The parchment paper and stamps are sooooo perfect. But what I’ve really taken away is having sandwiches at the ready, wrapped up to keep them away from outdoor critters or whatever. I have a large 4th of July group at our lakehouse and we try to live on breakfast, snacks/dips/appetizers, and then a late dinner. Having a big plate of the Hungry Hippies sounds fab!!
Have a great holiday, CoCo
We learn something new everyday – we have never, ever heard of this sandwich! It looks and sounds amazingly delicious! Can’t wait to give it a try for ourselves – and the hippies in our family HAHA!