A Quick and Easy Way to Age Paper
We’re sharing a quick and easy way to age paper today!
About this time each year my Mom and I start planning surprises for the littles.
While seeing everyone dressed up at my parent’s annual Spooky Soiree is always a big highlight, the littles LOVE Spooky Season.
So, we try to sprinkle a little magic into the month to help make it extra special for them.

Last year, I created Countdown to Halloween Treat Containers for the 7 days leading up to Halloween which was a big hit.
This year, my Mom and I are teaming up to surprise the littles throughout the month on October 1, October 13 and October 31.

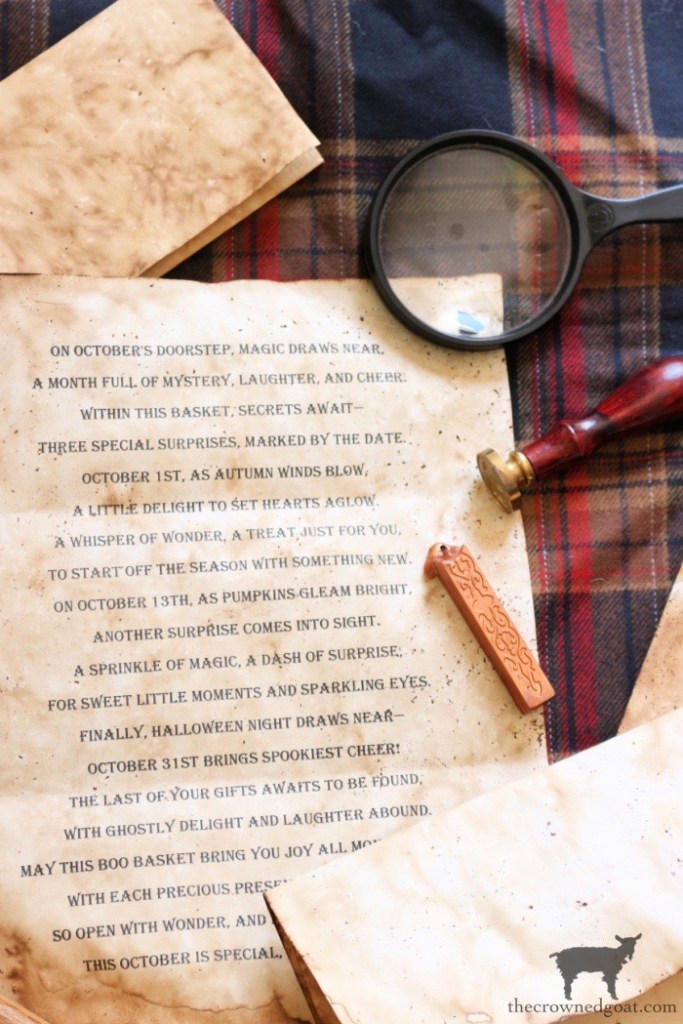
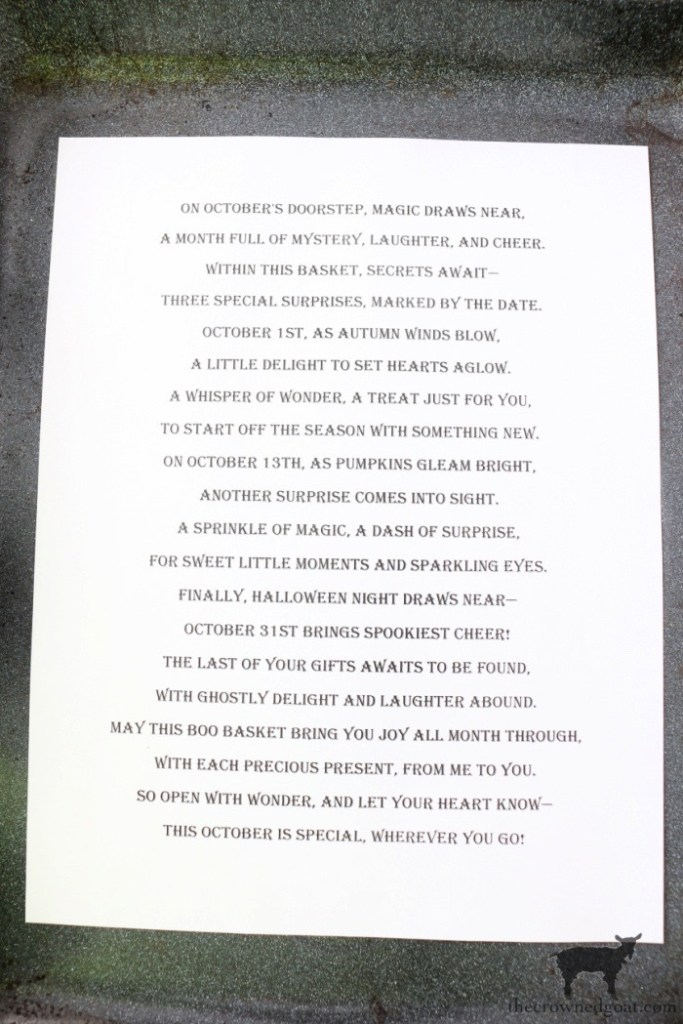
To help officially kick off Spooky Season, I used AI to create a festive poem.
It turned out so well, I decided to find a quick and easy way to age paper to make our Boo Basket experience even more festive.
Here’s a look at a quick and easy way to age paper in case you want to create something festive too.
A Quick and Easy Way to Age Paper…
Quick and Easy Way to Age Paper Supplies:
- Cardstock or Computer Paper
- Strong Coffee, Brewed
- Coffee Grounds, optional
- Pumpkin Spice, optional
- Cookie Sheet
- Foam Brush
- Fine Grit Sandpaper, optional
- Tarp
Quick and Easy Way to Age Paper Steps:
Gather your supplies and lay a tarp down to protect your worksurface.
If you have one, print your poem out on cardstock or a piece of computer paper.
We created this poem in Word using the Algerian font.
Then we used our printer to print the poem on computer paper.
While the ink on your paper is drying, brew a strong carafe of coffee.
Keep in mind, the darker the coffee, the darker your aged pages will be.
Allow the coffee to cool completely.
Place a single page onto a cookie sheet.
Then pour coffee directly over your page.
You don’t want to use too much coffee.
Rather just enough to color or age your paper well.

Next, add a few coffee grounds

and a sprinkle of pumpkin spice to your coffee mixture if desired.

Carefully, “paint” the mixture onto the pages.
Printer paper is thinner than cardstock.
So, keep that in mind as printer pages can easily rip or tear.
Allow your pages to dry completely. We used the oven method to dry ours.

Once your pages are dry, use fine grit sanding paper, a fine grit sanding block or your fingers to shake away the excess coffee grounds.

Here’s a look at a quick and easy way to age paper with words,

and here’s a look at aged blank pages.

Given the Boo Basket poem holds clues for the other gifts and surprises we’re planning throughout the month, I folded those aged pages and sealed them with wax.

They look top secret and official – the littles are going to love it!

All in all, I’m excited about the quick and easy way this aged paper came together.

Truly, there are so many other projects you can use this idea for like letters from Santa, holiday gift tags and even book page projects!

Other Aged Projects to Explore…
How to Make Book Pages Look Aged

How to Refresh an Old Cigar Box


Creating a Vintage Inspired Label

Many blessings,
CoCo


Oh my goodness! So many items to age! Thank you for such inspiration!
You are so welcome, Jan, hope you have so much fun making these! Happy Fall, CoCo
I love this, CoCo! Many years ago, I used tea to further age a small stack of vintage Christmas stationery. Then I handwrote an invitation to a Christmas party to celebrate my new house and a new chapter of my life. I also aged envelopes to send the invitations in. It was such a fun, creative, and easy project. I saved at least one invitation and matching envelope. You’ve inspired me to do something similar again. Thank you!
Hugs,
LeAnne
I love that you used this idea for Christmas, LeAnne. Handwritten notes and invitations are always such a treasure. Sending you hugs, CoCo
That is amazing! I love the way the papers turned out! Such a cute idea!
I really appreciate it, Susan, thank you! Hope you have the best month, CoCo
You and your mom are the best, and the littles are going to be so excited about this! That poem is excellent, and aging the paper it’s on makes it so special! The wax seal is the icing on the cake! I know they’re going to love it!
I love this idea CoCo. I have always used lipton tea bags and instant espresso. However, I love the look of your aged paper more! The wax seal is a perfect touch. p.s. found your post via Thistlekeeping!