Creating a Color Wash
Welcome back, you guys, I hope your weekend was a relaxing one! We had a great time visiting with family, celebrating graduation, a dance recital and a birthday. It felt like a tornado of fun but I wouldn’t have it any other way. Summer is the best time for new adventures!
I may have mentioned previously, my office also has a bedroom and bathroom connected to it. It’s actually a suite of rooms located on one end of the house. We were almost finished with the office makeover when my mom and I decided we should give the other rooms an update too. I didn’t want to do anything major – just small touches that were budget friendly but would also make the rooms more cohesive.
One of these projects included adding a color wash to the existing dressers. Given there are already several pieces of painted furniture in the bedroom, I didn’t want to paint another piece but I wanted to change the look a bit. The easiest way to change something you don’t want to change too much is to add a color wash.
Since I wanted the colors in each room of the suite to complement each other, I decided to create a color wash with Valspar’s Hot Stone. You may remember that is the color we chose to use for the accent wall in the office and also to paint the office chair. The color is really neutral so I knew we could use it to “age” the look of the dressers.
Here’s a look at the dresser before…

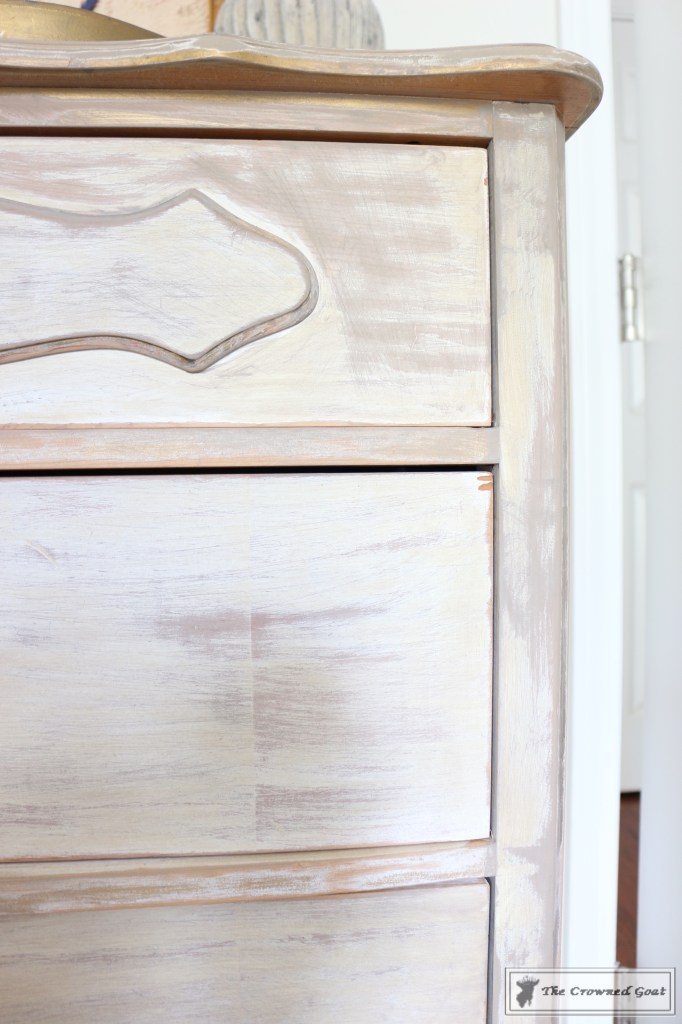
Creating a color wash is really easy, you mix one part water to one part chalk paint (I usually a plastic cup). I used the last bit of DIY chalk-like paint we previously used on the office chair to create the wash for these dressers. You can either apply with a brush, allow the mixture to sit on the piece for a few minutes and wipe away the excess OR you can dip the edge of a lint free cloth directly into the color wash and rub the wash into the piece. It’s definitely messier this way but it seems a bit easier to control the look of the wash.

Working in small sections should help your finished piece look consistent.

Rubbing in a wash, is kind of like rubbing on furniture paste wax, you definitely feel it in your arms.

Once you’ve created the look you want, allow to dry completely before applying a top coat. I let this piece dry overnight. The next morning, I applied clear furniture paste wax with a lint free white cloth then buffed with a medium-soft bristled brush.
Here’s another look at the dresser before…
and after…

I know, right? So easy for a subtle change! You guys can totally do this.

I just have a few more accessories to collect for this space but things are coming along nicely. Of course, everyone’s favorite Granny is staying

I’m working on a curtain and pillow project complete with pom pom trim so I’ll share it with you on Wednesday. Until then, I’ll see you on Facebook, Pinterest and on Instagram for all the latest fun!
Many blessings,
CoCo


Oh my gosh…I don’t know how we missed this post! Love this color wash treatment. It’s amazing how it transformed your dresser. Great job CoCo!
Thanks so much ladies, I appreciate it! Hugs, CoCo