Festive and Easy DIY Halloween Shirt
We’re sharing a festive and Easy DIY Halloween Shirt today!
When I first approached my Mom and sisters about wearing royal-inspired Halloween costumes, it took them a while to say yes.
In fact, it wasn’t until I heard they had ordered their tiaras just a week before my parent’s annual Spooky Soiree I knew they were serious about dressing up.
“I’m only doing this because I REALLY love you,” my middle sister said. “This is SO not me,” she followed.

Truthfully, my Mom was hesitant as well.
“I don’t know how I’m going to serve mummies in a blanket wearing a ball gown,” she said.
But I assured them it could be done.
“I’m willing to try it,” my Mom finally relented. “But I don’t know if I’m going to wear the gown all night. I need you to come up with another idea that’s festive but comfortable because I do not see myself doing dishes in a crown and crinoline when this is all over.” 😂
The following day, I went to Joanns to see if I could find something we could easily change into when the party was over.
I was searching for inspiration in the aisles when I thought about the monogrammed sweatshirt I made last Christmas.
I knew if we could find some iron-on appliques, or patches a festive and easy DIY Halloween shirt would be just as simple to create.

Here’s a look at how to create a festive and easy DIY Halloween shirt…
Halloween Shirt Supplies:
- Tee Shirt (remember to wash and dry before you DIY)
- Chalk or Pencil
- Halloween or Fall Inspired Iron-On Patches or Transfers
- Ironing Board
- Iron
Halloween Shirt Steps:
Gather your supplies. Make sure your tee shirt has been washed, dried, and is free from wrinkles.
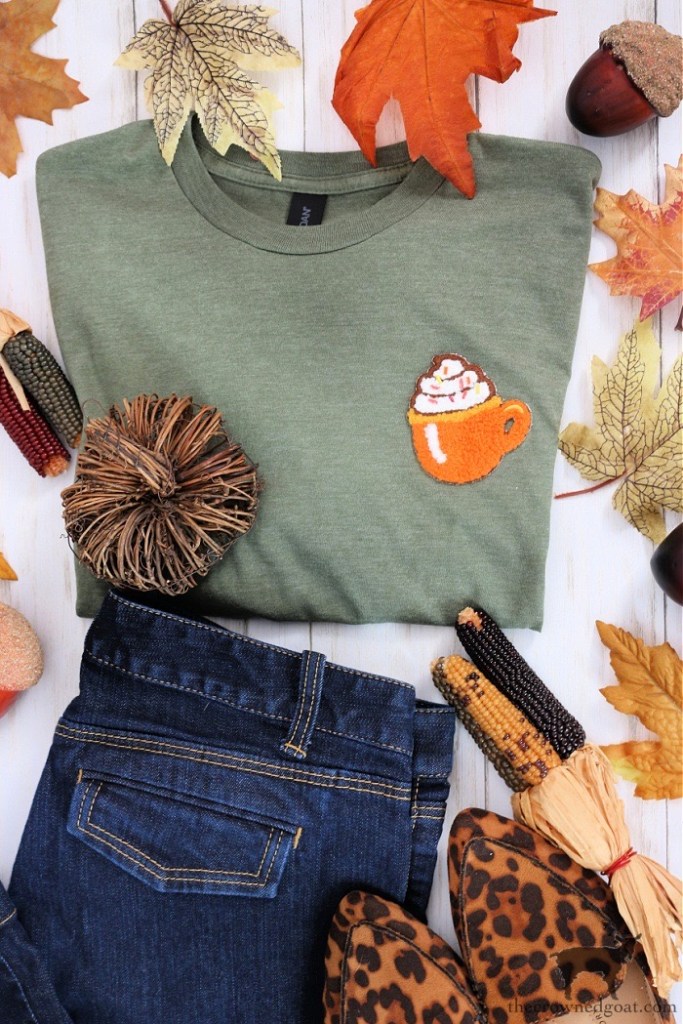
We bought both the tee shirts (from the Gilden line) and the iron-on appliques (from the Hidie and Jo line) at Joanns.
One is the color of a caution cone.
The other is a mossy green which doesn’t convey very well in these photos.

Lay your tee shirt on a flat surface.
Then measure and place your iron-on applique onto your tee shirt.
The standard placement is 7-9 inches down from the left shoulder seam.

Keep in mind, you can always use a piece of chalk or a pencil to help mark the outline of your applique.

Using caution and care as the iron will be hot, iron over the applique as per the directions on the packaging.
While it’s basically the same concept, there were more instructions for the Fall mug applique than the treat applique.
So, keep that in mind if you decide to do multiple DIY Halloween shirts as we did.

Next, flip your tee shirt inside out. Again, using caution and care as the iron will be hot, iron the back of the applique.

Carefully, flip your festive and easy DIY Halloween shirt back to the front and allow it to cool completely.
Enjoy!

Seasonal projects like these are a really simple way to create something celebratory in a pinch.
Especially, if you don’t have a special vinyl-cutting machine.

Our family dresses up every year and the littles are always so excited to see how all the adults dress up. I think it reminds them that you’re never too old to have fun or to be creative!

If Halloween is not your thing, no worries!
You can wear this to the pumpkin patch, a pumpkin carving party, to meet a friend for coffee, or to add a little holiday cheer to the trick-or-treaters in your neighborhood.

Let us know if you’re planning to dress up this Halloween or what your favorite costume was as a kid!
Until next time, I’ll see you on Instagram, Facebook and Pinterest.
Many blessings,
CoCo


This Halloween shirt is such a fun idea, thanks for sharing!
Thanks so much, Josiah, I really appreciate it! Hope your week is a fun one, CoCo
Coco, I love the t-shirt idea and the appliques used. You look absolutely radiant! Hugs and happy fall🍁🍂 Kim
Such sweet and kind compliments, Kim, thank you so much! These shirts were so much fun to make and honestly, you can do this same idea for the holidays too. It’s so hard to beieve it’s almost here! Hugs and happy fall to you too, CoCo
I loved your idea to use the iron-ons to create this super-cute shirt, and your step by step instructions were so easy to follow!
Thank you, Heidi! They were so much fun to make! Hope you’re having the best week, CoCo