How to Sew Bed Crown Curtain Panels
Now that the One Room Challenge has officially ended, I can finally share how to sew bed crown curtain panels. I couldn’t share them beforehand because I didn’t want to show too much about the bedroom makeover before the final reveal. I mean, there had to be some element of surprise, right?
As I’ve shared with you guys many times, up until I decided to tackle sewing the panels for the bed crown and the curtains for the bedroom, I had literally only made a few pillow covers, a set of no-sew curtains and some hair scrunchies to go with my cheerleading uniform in Home EC class.
Looking back, I don’t know what possessed me to tackle sewing 16 yards of Waverly fabric for the bed crown panels and the bedroom curtains. Honestly, I can’t even tell you guys how nervous I was to make that first cut and sew that first seam!

I’m not a sewing expert at all. In fact, I almost didn’t share this how-to based solely on that fact.
But I kept thinking about how about the little apartment I lived in during graduate school. The one that was in a not-so-great section of town. The one I would sit in and dream about one day having a home I loved filled with the things I loved and saw in books and magazines. The one I was embarrassed by because it didn’t seem good enough to have anyone over.
It’s only now I realize that little apartment gave me the freedom to be creative and to learn what I liked and what I didn’t like. I also learned with hard work and basic DIY skills you can have a home you love, filled with the things you love, no matter the size of your budget or your address. We still live those guiding principles every day.

So, it’s in that spirit, I’m sharing how to sew bed crown curtain panels because if you can sew a straight(ish) line, you can make these panels. And for that matter, you can sew curtains for any space in your house too.

Here’s a look at all the details…
Bed Crown Curtain Panels Supplies:
- Sewing Machine
- Fabric (we needed 10 yards of fabric and made 4 panels in 2 different sizes*)
- Coordinating Thread
- Ruler or measuring tape
- Scissors or Rotary Cutting Tools & Self-Healing Mat
- Pins
- Iron
Bed Crown Curtain Panel Steps:
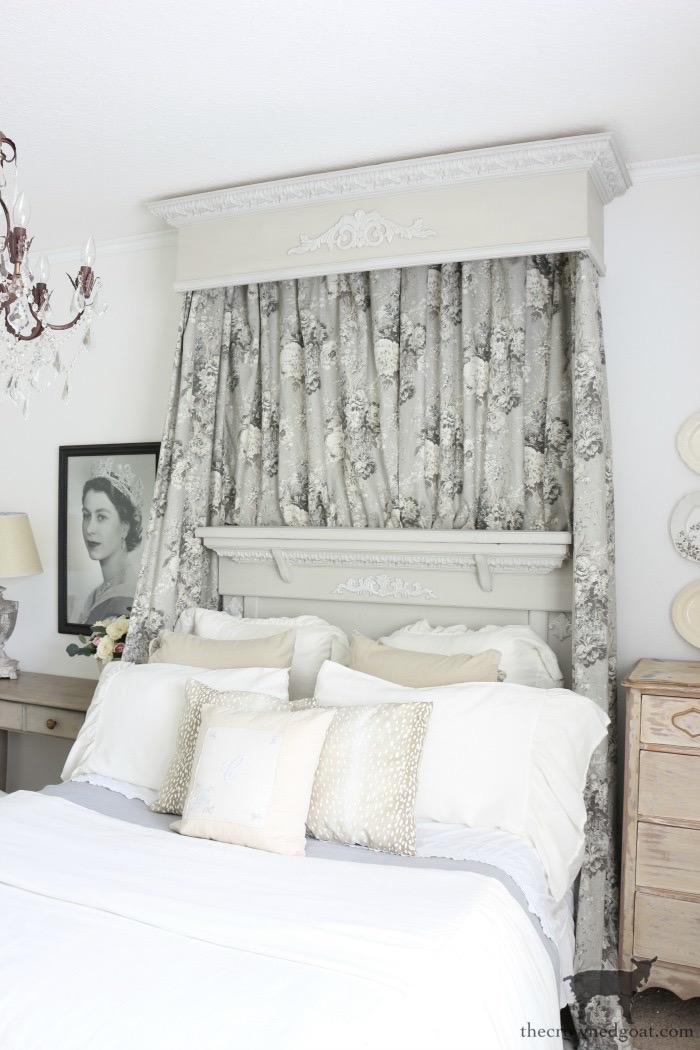
The first step is to determine how much fabric you’ll need for your bed crown curtain panels. You can see how we constructed the DIY French Country Bed Crown here. As we shared in that post, our panels will be attached to the bed crown by using a dowel and strap system and then fabric will be attached to the dowels via curtain rings and clips.
We needed 10 yards of fabric to make 4 bed crown panels in 2 different sizes. Because of the way the mantel is constructed and secured to the wall, the two panels in the back do not go all the way down to the floor like the two panels on the sides do so keep that in mind.
It’s also important to consider the weight of your fabric when you’re working on projects like these, as home décor fabrics come in a variety of weights.
Finally, just for reference, our ceilings are 9 feet tall and the Waverly fabric we used is 54 inches wide.

Using caution and care as both rotary cutting tools and scissors will be sharp, cut the panels for the sides of the bed crown first. We used 6 yards of fabric.

Trim off the selvage (usually the white part with the writing) with scissors or a rotary cutting tool, if desired. Just be sure to mark the direction of the pattern on your fabric. It makes a huge difference!

To create a hem on the side of your bed crown panel, iron a 1-inch hem along the entire length of the fabric using caution and care as your iron will be hot. A measuring tape or ruler can help guide you.

Turn the fabric over one more time to enclose the raw edge in the fold and iron again. Use pins to help hold your fabric in place, if needed.

Sew the hem closed all the way down the bed crown fabric panel using a narrow 1/8-inch seam allowance.

Repeat this process for all 4 sides of each of your bed crown panels. After you’re finished sewing the panel, attach the fabric with curtain rod clips and

slide the curtain rings on the dowel.

Assuming your bed crown and bed crown fabric panel hanging system has been completely secured, you can hang the bed crown panels.

Depending on the size of your bed crown and your bed panels, you’ll probably have to do a bit of fluffing, we definitely did!

I think of all the projects we completed for the One Room Challenge adding the bed crown made the biggest impact. It’s hard to believe I originally wanted to use shiplap in this space! Now that the bed crown is installed and the layers of Waverly fabric from the bedroom curtains and the bed crown panels have been hung, I can’t imagine using anything else!

This is a great time of year to learn a new skill like sewing, you guys! Honestly, if you can learn even the basics it can change your home décor game for good. With just a few basic skills you can sew everything from pillows, to blankets, to shower curtains to bedroom curtains and even bed crown curtains too.

Don’t let being scared of “messing it up” hold you back like I let it hold me back in that little apartment for so long. You can start creating a home you love right now. Little by little all the changes start adding up, I promise. Until next time, I’ll see you on Instagram, Facebook and Pinterest.
Many blessings,
CoCo


I hope this is as easy as you say Coco because fabric is expensive. I would love to do something in the girls room. Maybe this summer I’ll give it a go
CoCo – your bed crown and choice of fabric is so beautiful! We had a bed crown at our previous home and it was not nearly as elegant or royal LOL. Thank you for sharing your great ideas, tips and inspiration! Much love!