How to Make a Simple Herb Topiary
We’re sharing how to make a simple herb topiary today!
Are you looking for easy projects to help give the spaces in your home a quick refresh in any season? We are too which is why I’m excited to share how to make a simple herb topiary with you today.
Over the past few months, I’ve been helping my parents make some decisions about my childhood home, Loblolly Manor.
There’s nothing wrong with the house at all. It’s just that when we “finished” Loblolly in late 2016 they were in a much different season of their lives.

At the time, I had just completed The Horse Farm Project when my Mom asked if I would help her create a retreat space at Loblolly that felt more “intentional.”
We’ve been plotting, planning, dreaming, scheming, and drawing up ideas ever since.
I traveled to Loblolly a couple of weeks ago to start working on the first phase of our plans which were primarily focused on moving furniture from one room to another, decluttering, painting pieces of furniture they already owned, and completing small but impactful projects.

One of those small but impactful projects was making a simple herb topiary for the kitchen. I loved it so much, I made one for our house as soon as I got home!

Here’s a look at how to make a simple herb topiary if you want to add some no-fuss greenery to your home too…
Simple Herb Topiary Supplies:
- Green Spray Paint (not pictured)
- Craft Foam Balls (we started out using 3.8 but ended up only needing a 3.3 in)
- Faux Dill (we found ours at Hobby Lobby on sale)
- Moss (we found ours at Hobby Lobby)
- Sticks (we found these in the yard)
- Dirt (fresh potting soil or sand)
- Wire Cutters
- Floral Wire (if needed)
- Flower Pot or Container

Simple Herb Topiary Steps:
In a well-ventilated area, using caution and care, spray paint the craft foam ball green.
Keep in mind, you’ll want to choose a green that closely resembles the color green in the stems of the herb you are using for this project.

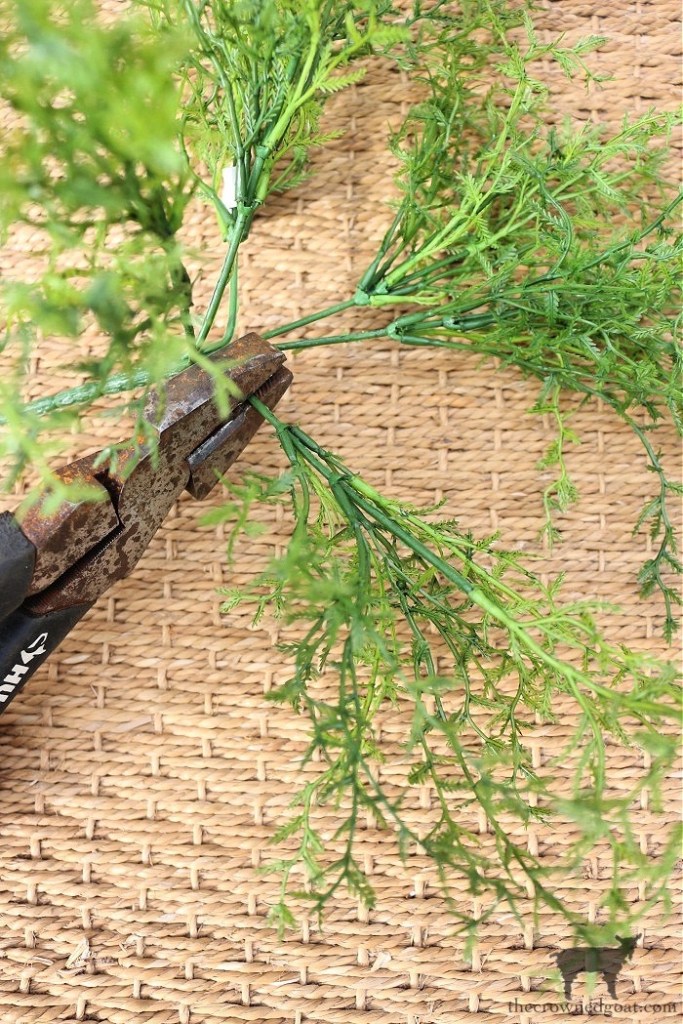
While the craft foam ball is drying, pull apart the stems of the faux herb you are using.

Then using caution and care as wire cutters will be sharp, carefully cut each stem.
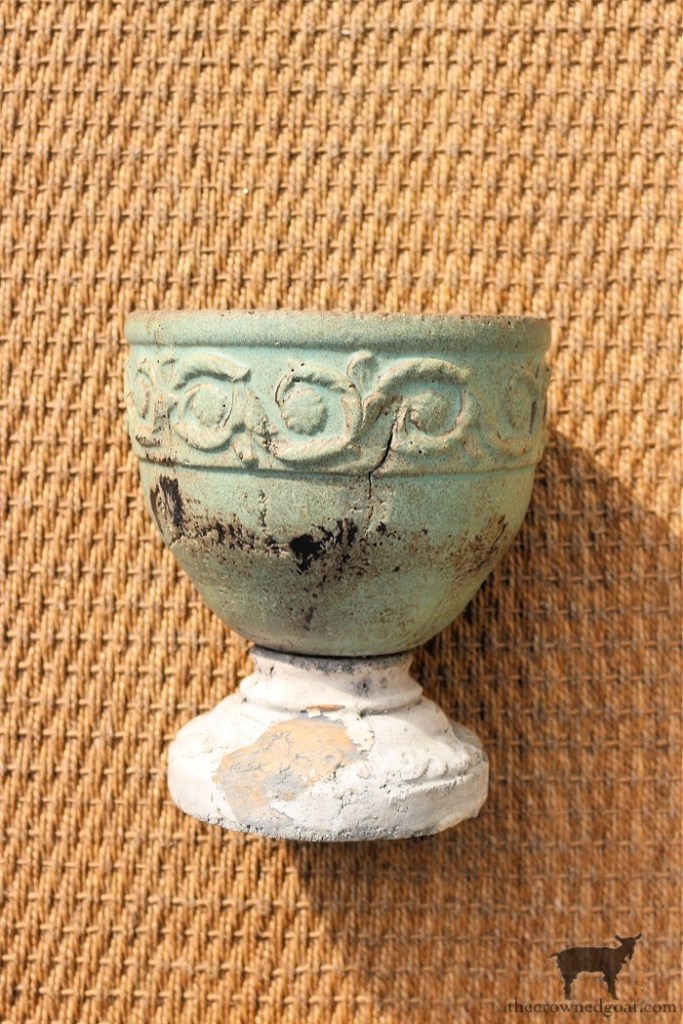
Place dirt or potting soil in your container of choice. This container was a fabulous find from one of my sweet aunts who let us shop her stash.
If you have a style that is even remotely similar to some of your friends or family members consider hosting a swap party – it is so much fun and free too!
Place the craft foam ball on the stick and then into the dirt making sure they are both secure.
Again, using caution and care as the faux dill stems have been cut and will be sharp, place the stems into the foam craft ball until you have the craft foam ball completely covered.
Some of them will be longer than others so you may be able to get 2 herb sprigs out of one stem.

It took us about 4-5 bunches of faux dill to cover a craft ball that was 3.3 inches.

You can always use smaller craft foam balls too though. Honestly, it all just depends on the size and scale of your container.

Make sure the dirt is tightly packed around the simple her topiary (you don’t want it to fall over) before adding a bit of moss to the top of the container.

Decorating with Greenery…
This simple herb topiary could not have been easier to make and you can use them all around the house because they’re super neutral.

We decided to make this topiary into a grouping for the kitchen at Loblolly and it makes an impact as soon as you walk through the door.
This was the space before…

and this is after we decluttered and created a simple herb topiary vignette…
It’s such a small change but one that made a big impact! I know it’s not always easy but decluttering and adding pops of greenery are two inexpensive ways to freshen up any space in your home no matter what the season!

I can’t wait to see how the rest of our plans come together now. The small grayish-white container was a thrifted find for just $2 dollars and we already had the white container on hand.
As much as I prefer real plants and flowers, I know it’s not always an option. Especially, if you live out of town or have bad allergies.
So, don’t be afraid to try quality faux plants or flowers – they can still make a big impact!

We hope this simple idea has helped. Let us know what you’re planning to make this season! Until next time, I’ll see you on Instagram, Facebook and Pinterest.
A Few Other Quick and Easy DIY Topiaries To Try:
How to Make a 5-Minute Topiary

Simple Lavender Topiary and Summer Celebration Blog Hop

Many blessings,
CoCo


I am shocked that topiary is fake. Running to Hobby Lobby right now. Thanks CoCo
I know, Brianna, it’s bananas! I really think you will like this faux dill. It would go great in an urn or a topiary. Let me know if you find it! Hugs, CoCo
It looks so real and really adds warmth to the area.
Thanks so much for your sweet words, Lizzy! We love how brought a fresh new life to the kitchen too. Hugs, CoCo
Love this! I’ve got to make one for my kitchen now 🙂
You’re so sweet, Angie, thank you! I just made one for mine too and now I want them all over the house he he 🙂 Sending you big hugs, CoCo
This topiary looks real, CoCo, I can’t get over it. I will definitely try to make one of these. I need all the help in the plant department I can get. Thanks, Sarah
The only thing this topiary is missing is the smell of herbs, Sarah! This didn’t take long to make at all and it’s great if you don’t have a lot of time to care for plants on a regular basis. Hugs, CoCo
What a lovely idea Coco, very creative. I have pinned it so I can have a try sometime. Thanks for sharing with us.xx
You are so welcome, Janette! You can pretty much do this same idea with anything that has a stem – including flowers if you like! Hope your weekend is tons of fun, CoCo
Hey CoCo – we love topiaries but never thought of making one with herbs. So smart…and pretty! Thanks for sharing your great idea.
I appreciate it ladies, thank you so much!
LOVE these! So clever and easy to follow instructions.
So pretty Pinned!
Thanks so much, Cindy, I really appreciate it! They were super easy to make and we use them all over the house too. Hugs, CoCo
It’s beautiful!! I love the way that those stems create like a drape-like effect off of that foam ball. Using faux greenery is so fun because there are so many options and ways you can use it!! Thanks for sharing this CoCo…I love it!!
Thank you so much, Rachel! This topiary couldn’t have been easier to make and you can create all sorts of looks with different herbs and stems throughout the year. I love that you don’t have to worry about keeping them alive either. It’s all I can do to keep the plants on my porch 😂 Sending you hugs for a happy weekend, CoCo
I love this idea, CoCo as live herbs absolutely will not grow in my apartment. xo Laura
Thank you so much, Laura! My Mom always falls in love with the topiaries she sees in magazines but because they travel back and forth between places there is no way she’d be able to keep them alive either. I know faux plants aren’t for everyone but they have some very realistic-looking stems nowadays and they really do make an impact. Hope your day is filled with all good things, CoCo
I love topiaries so much! Yours looks fabulous! I have a very similar project on my to-do list for Spring! Great minds think alike huh, lol!!!! Have a wonderful week!! Blessings, Donna
They do, Donna! I’m so excited you’ll be making a similar topiary soon too. I swear they go with anything and you can decorate with them all over the house. Plus, there are so many pieces of faux greenery that look real now which is really nice. Can’t wait to see how yours comes together! Hugs, CoCo
CoCo
This is a great tutorial! Love topiaries!
Thank you so much, Rachel, I really appreciate it. They were super easy and we use them all the time! Hugs, CoCo
I absolutely LOVE your topiaries, CoCo!! Faux dill is one of my favorites but I never thought to use it for a topiary!! You always inspire my friend!
Thank you so much, Christine, I really appreciate it! They were so easy to make and we’ve used them at 3 different houses now. They make the transition from winter to spring such an easy one. Hugs and happy crafting, CoCo
Perfect timing for this project – spring and summer would be a great time to add these topiaries to my decor! Thanks, CoCo – I’m going to make these! Pinned 🥰
I am excited to feature this post in Tuesday Turn About this week! I hope to see you at the party this week! 😊
I really appreciate it, Cindy, thank you so much! Sending you big hugs and thank yous, CoCo
I absolutely love these topiaries CoCo ♥
Thank you for sharing your tutorial for making simple herb topiaries at Create, Bake, Grow & Gather this week. I’m delighted to be featuring them at the party tonight and pinning too.
I’m always grateful to have you share your fabulous projects at the party. Hope you are doing well sweetie.
Hugs,
Kerryanne
I really appreciate your sweet words, Kerryanne, thank you so much! We’ve been in and out of town so much lately, I’m thankful things will be slowing down a little bit soon. Sending you lots of hugs and thanks yous and I hope your week is a special one, CoCo
These are gorgeous! I adore topiary…I’ve had some live ones (I have rosemary now), and a faux one for years that needs some love, but by far, the faux is my favorite. Keeping them alive gets old, fast! LOL. I do wonder why you used soil for a base, though? I would think that foam would be a better (read cleaner) choice, especially if you use heavy pottery. I will definitely be making some of these!
You have the greatest ideas that seem so easy to do. As a person who isn’t that crafty, you make it easy to do. Thanks for sharing!
I love this idea! It’s such a simple and affordable project that can be the centerpiece of a vignette. Your Mom is so lucky to have such a talented daughter.