How to Stencil a Concrete Floor Like a Pro
Today, we’re sharing how to stencil a concrete floor like a pro. A special thank you to Royal Design Studio Stencils for sponsoring this post!
Of all of the projects related to the master bedroom makeover, stenciling the concrete floor was the task I was most excited and also the most nervous about. We knew in advance this would be a time consuming project and with our six week One Room Challenge timeline, I knew there was a chance we would be cutting it close.
Well, I’m happy to report we finished this project in plenty of time and it changed the look of the entire room!
Here’s a look at how we completely transformed the bedroom floor with the help of Royal Design Studio Stencils…

Prep Before You Paint
There’s a lot that goes into stenciling concrete floors but nothing more important than prepping and cleaning the floors before you paint them. We painted our floors in Valspar’s Porch, Floor and Patio Paint in Ultra White.
It was a ton of work (around 4 days due to drying time) but it’s really important to have a good foundation anytime you’re painting and stenciling concrete floors. You really want your work to last.
Especially, if you plan to have a floor that will be a statement maker.

Choose Your Floor Stencil Wisely
We knew early on we wanted our concrete floor to have a tile pattern that would have an elegant feel to easily mix with our Southern style. Over the course of a few days, we searched for the perfect tile and were excited to find the Lisboa Tile Stencil from Royal Design Studio Stencils.
We stenciled the curtains in our dining room using another Royal Design Studio Stencil a few years ago and I can honestly say they help up really well. So, it made us even more excited to try their stencils on the bedroom floor.

Review Stenciling Instructions Prior to Starting
As soon as the concrete floors were cleaned, painted and prepped, we set about transforming them with the Lisboa Tile Stencil. If you’re new to stenciling or need a reminder, Royal Design Studio Stencils has a wide range of tutorials and videos dedicated to stenciling and various applications.
Even though I had stenciled the curtains, I’m new to stenciling concrete floors. So, we watched the video How to Stencil a Concrete Floor in 10 Easy Steps before getting started.
As recommended, we used a tape measure and a chalk reel to mark the center of the room.

Choose the Right Paint
I mentioned earlier we painted the floors with two coats of Valspar’s Porch, Floor and Patio Paint in Ultra White which is the same color as the board and batten. We also wanted to use the same color for the stencil that we used on the walls.
So, we had the paint department tint the paint in Cathedral Stone. Keep in mind, floor, porch and patio paint has a completely different texture and consistency than some latex paint, chalk paint or even milk paint does.

For this reason, we chose to use a sponge roller to apply the stencil to the floor.
We used one tray to keep the porch paint in and we lined a separate paint tray with an old towel. That way, we could easily off load any extra paint on the roller.
Off loading the paint is a really important step so don’t skip it! You don’t want any paint overspray on the floor or paint bleeding through the stencil because your foam roller is squishy from too much paint!

How to Stencil Concrete Floors
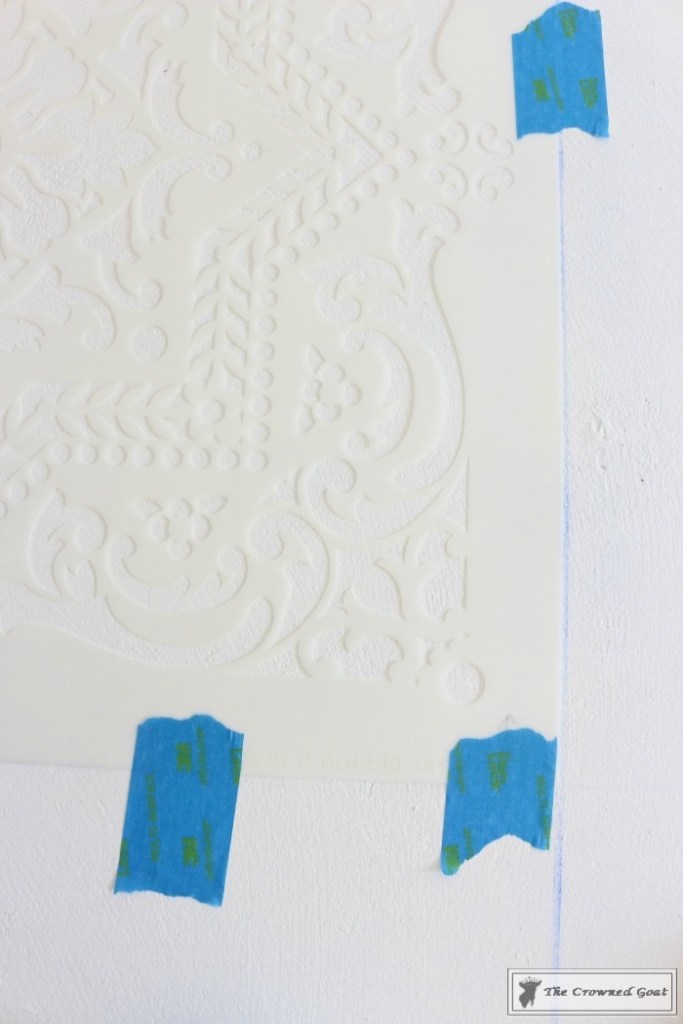
Once you have the center of the room marked and you know your start point, lay the stencil flat and use painters tape to help secure it in place.
Then roll paint on the stencil until it’s completely filled. You may use a light touch at first until you get the hang of how much paint should be on the roller.

Royal Design Studio Stencils has a fun feature on their stencils called registration marks. This helps you know where to reposition the stencil as you’re moving it from place to place.
You can see one of the registration marks on the Lisboa Tile Stencil here!

Moving the stencil made me so nervous at first but it’s just like the amount of paint on the roller, it gets easier the more you do it.
Make sure you’ve allowed plenty of time for the paint to dry before you move it.

It wasn’t until we got to row three that we really started to see how much of a statement the Lisboa Tile Stencil was making on the concrete floor. I mean look at this!

Gah! So exciting!

Troubleshooting the Edges
I stenciled the majority of the floor before I started to stencil the edges of the room. Mostly because I knew I would have to bend the stencil and I wanted to make sure I didn’t damage the stencil in any way.

I even had to tape the stencil to the wall in some places!

The stencil was flexible and durable enough to get the portion of the pattern required for the baseboards. That said, be extra careful you’ve secured the stencil completely before you start rolling on your paint. You’ll likely need more than two pieces of tape to keep the stencil secure.

Sealing the Stencil Concrete Floors
Since we’re using this specific porch, floor and patio paint indoors, according to our paint retailer, a sealer wasn’t required.
Most paint will require a sealer though. So, make sure you use the correct sealer for your type of paint. Especially, if you’re using this technique to stencil a concrete floor that will be exposed to the weather elements.
Believe me. you’re going to be excited when you finish a big project like this! So, you’ll definitely want to make sure your hard work is protected.
I can’t believe how much this stencil changed the look of the concrete floors. But also the look of the entire bedroom. We still need to put in the quarter round. That said, things are starting to come together. It’s going to be much fun!

A big thank you to Royal Design Studio Stencils/Modello Designs for sponsoring this post. All experiences and opinions are my own.
If you want to find out more about the Lisboa Tile Allover Stencil and so many other products this fabulous company has to offer, check out the Royal Design Studio Stencils website here. You can also check them out on Instagram, on Facebook and on Pinterest too.

We have many other projects on our bedroom makeover list to finish. But I’m so excited we decided to stencil these concrete floors.

Let us know if you decide to stencil a concrete floor like a pro too! For more on how this makeover came together for the One Room Challenge, check out our ORC Master Bedroom Reveal post here. Until next time, I’ll see you on Instagram, Facebook and Pinterest.
Many blessings,
CoCo


WOW.WOW.WOW. The stenciled floor looks amazing! You definitely had a vision and saw it come to life. The design is highly impactful and looks fantastic in the room! Well done!
You guys are so sweet, I really appreciate the love! It’s crazy how much one stencil can change an entire room, right? Hugs, CoCo
Gorgeous! So worth it! I can’t believe how awesome this looks. This is stunning Coco!
Nancy
Thank you so much, Nancy. It’s definitely one of my favorite projects I’ve ever completed. I still can’t get over it! Hugs, CoCo
CoCo this is amazing! I can’t believe a stencil and floor paint can make your concrete floors look like tile. I know this must have taken hours but wow worth every bit of effort. It’s gorgeous.
Thanks so much, Sarah, I really appreciate it. It does take a little bit of time but once you start seeing the patterns form and the room taking shape it really helps to keep you going. Sending you hugs, CoCo
I don’t know how you have the patience to do half of the things you do CoCo. This looks amazing. Great job, Bonnie
You’re sweet, Bonnie, thank you. I was so nervous at first but sometimes you just gotta dive right in, you know? Hugs, CoCo
Loving it!
Thanks so much lady! Hugs, CoCo
Hi there,
Thank you for this tutorial on stenciling a concrete floor! I purchased a stencil as well, but not the Lisboa. I purchase the Anatolia stencil from Royal Design Studio. I also used the Valspar paint you used, the Floor, Patio and Porch paint, for both the base coat and stencil colors. I stenciled a concrete floor in my basement.
May I please ask you, how has your floor held up these past four years without having put a concrete sealer over the paint? You mentioned you were told by the retailer that this specific Valspar paint does not require a sealer. Just curious if the paint has held up well without it.
Thank you!
You are so welcome, Sue! Working on DIY projects like these are always exciting. Our floors are holding up well after 4 years of constant use. I definitely wish I would have added a sealer as a top coat though because the concrete is starting to wear more in certain areas than I expected. When I clean the floors now, bits of cleaning residue stay in the nooks and crannies. Also, we have a large jute rug that has not worn well at all and the stencil looks like it has worn at a slightly different rate under the rug. Other than that, the stenciled floors still look great. Hope this helps, I’ll try to do a full update soon! Good luck with your basement makeover, CoCo
Thank you so much for your feedback! I asked you because I am having trouble deciding on which topcoat I should use. Many DIY videos show Varathane used as the topcoat, but that product is used for wood. When I called Rustoleum, who makes Varathane, they said they couldn’t guarantee the product because it is not designed for use on concrete:(
That is very interesting, Sue, and good information to know too! I really appreciate you sharing!
I just read your post about stenciling concrete and found it so helpful. I’m stuck with some decisions and could use some advice. I’m trying to find a stencil for the walkway to my front door. There is already segments (or stamping) in the concrete that measure 24”x24”. Which stencil size would you recommend to cover nicely? I’m happy to send a picture of the space if it helps. Also I have 2 grey tones which I like. I don’t want a huge contrast in the color but want to make sure my efforts are noticed. Do you recommend the darker for the base and the lighter for the stencil or the other way around? Just trying to figure out what the rule of thumb is. Thank you
Tara
Thank you so much for your kind words, Tara, I really appreciate it and I’m so sorry for the delayed response. It’s really hard to say what size stencil you might need without being in your space. Both of the spaces we stenciled (the pantry walls and the floor of the master bedroom) were visually big spaces so we needed a larger stencil to cover a wide area. That said, the walls in our pantry are around 20 inches and while we chose a larger stencil it was difficult at times to maneuver around the edges and corners. Looking back, I wish we would have chosen a stencil that was medium-size because it would have been more manageable around those tighter areas. As far as the contrast in paint goes, it’s usually easier to have your base layer be a lighter color and your stencil be painted in a darker color because it is not easy to cover up dark paint with light paint. Hope this helps! I’ll definitely be cheering you on, CoCo
Do you have to use a base coat prior to stenciling on a concrete floor if I put a sealer on when the stencil paint dries?
That is a great question, Denise! We’ve painted and stenciled the floors in two different rooms of our house now and we’ve used a base coat each time. I’m not an expert by any means but it likely depends on what kind of shape your concrete floors are in and the color you plan to use for your stencil. Hope this helps and happy DIYing, CoCo