No Sew DIY Grain Sack Pillow Cover
We’re sharing these no-sew DIY Grain Sack Pillow Covers as part of Miss Mustard Seed Monday, a new mini-series we’re introducing as we count down to the launch of Marian’s upcoming book, Feels Like Home!
Recently, I spent an entire weekend snuggled up with a pumpkin spice golden milk latte reading through an advanced copy of Feels Like Home as part of the book launch team.
I wasn’t really sure what to expect given Marian lives in a typical suburban home now and her business has grown and changed so much over the years.
Marian’s blog, Miss Mustard Seed was one of the first blogs I ever read. I would literally spend HOURS soaking up her posts on antiques, ironstone, painting, and seasonal decorating ideas.
I don’t want to give too much away but I can honestly say, the book does not disappoint.
From start to finish Feels Like Home takes us room by room and guides us through crafting a signature style, motivational assignments, DIY project tutorials, and lots of visual inspiration.
Simply put, it’s quintessential Miss Mustard Seed!

Projects From Miss Mustard Seed Archives…
While my style is a bit different from Marian’s, I’ve learned so much from following her over the years.
So, I thought it would be fun to dig into her vast archives (talk about getting lost for hours – they’re a treasure trove) to revisit and recreate some of our favorite home décor and DIY projects Miss Mustard Seed helped to inspire.

Here’s a look at how to make no-sew DIY Grain Sack Pillow Covers…
DIY Grain Sack Pillow Cover Supplies:
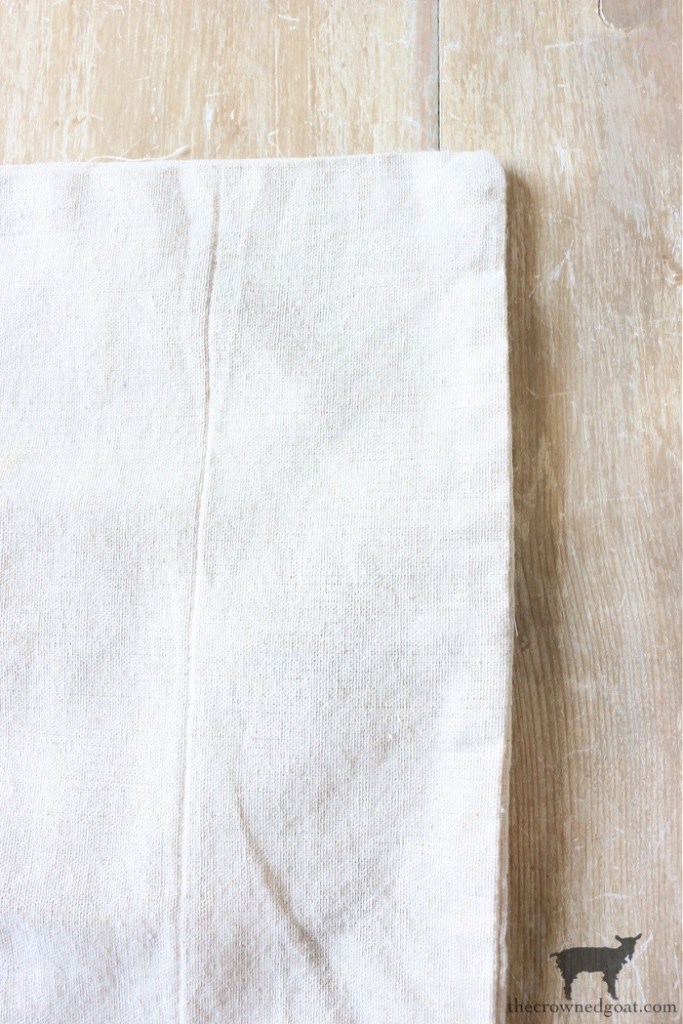
- Pillow Covers (We found these oatmeal-colored linen-like pillow covers on sale at Hobby Lobby)
- Fabric Paint
- Small Detail Paint Brush
- Fine Detail Art Brush
- Letter Stencils
- Washi Tape
- A Piece of Thick Cardboard
- Fine Grit Sandpaper (We used 220-grit)
- Measuring Tape
- Tarp
DIY Grain Sack Pillow Cover Steps:
Gather your supplies and lay a tarp down to protect your work surface. Using caution and care, steam or iron out any wrinkles on your pillow covers prior to moving on to the next steps.
Next, insert a piece of thick cardboard inside your pillow cover to help keep the paint from bleeding through.

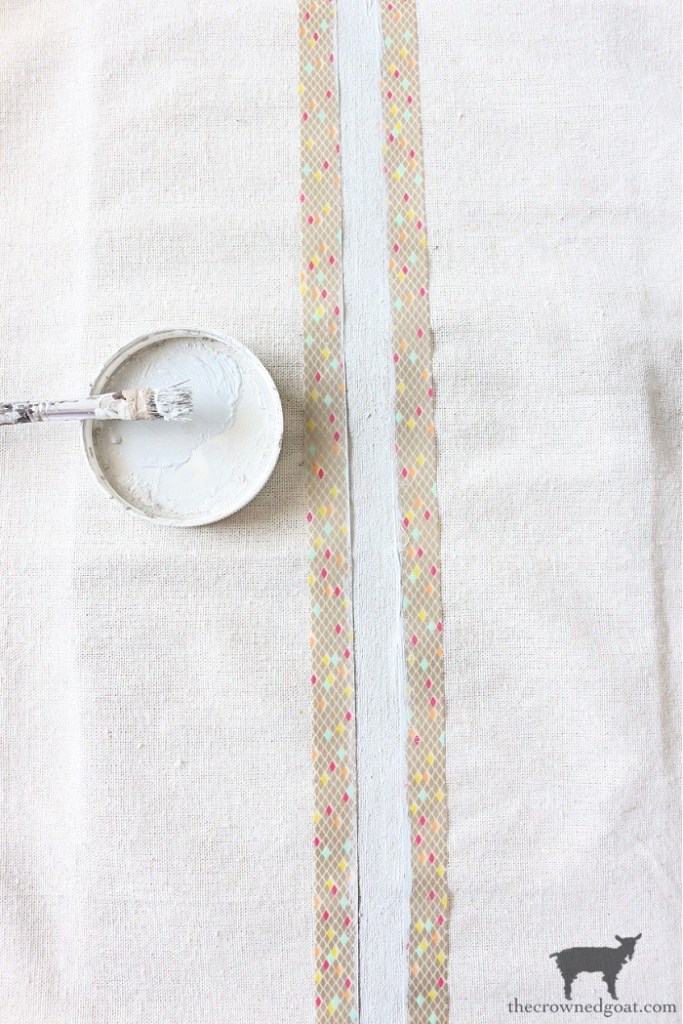
Use a tape measure to find the center of your pillow cover. Be sure to consider the width of your washi tape while measuring.

Place several pieces of washi tape on the pillow cover and make sure they are secure.

Then gently remove the piece of tape exposing the portion you wish to paint. This will become your first grain sack stripe.

Next paint the stripe in the color of your choice. We used a very pale gray because we adore neutrals and wanted the monogram to have a “worn over time” look.
Miss Mustard Seed’s signature colors are blues, greens, and creamy whites if you’re looking for something that is closer to her style. She’s also even used red in the past and it’s really pretty too!
Adding a Monogram…
Once your stripes have completely dried, it’s time to stencil the letters on your no-sew DIY grain sack pillow covers.
Marian does her letters freehand, but I can barely draw a straight line. So, I cheat a bit by using these European font style stencils we found several years ago at a craft supply store.

Because the letters are intricate, I place the stencil beside the stripe and shade in the areas I’m supposed to paint.

Then I use a fine detail art brush to fill in the shaded areas with paint. Don’t stress if it’s not perfect – it’s not supposed to be!

After the paint on the letters is dry, remove all the washi tape and use fine-grit sandpaper to *lightly* sand over the painted areas.
This will sand down any bits of paint that might have been caked on, will smooth out any rough edges, and will also give your no-sew DIY grain sack pillow cover a bit of patina and age.

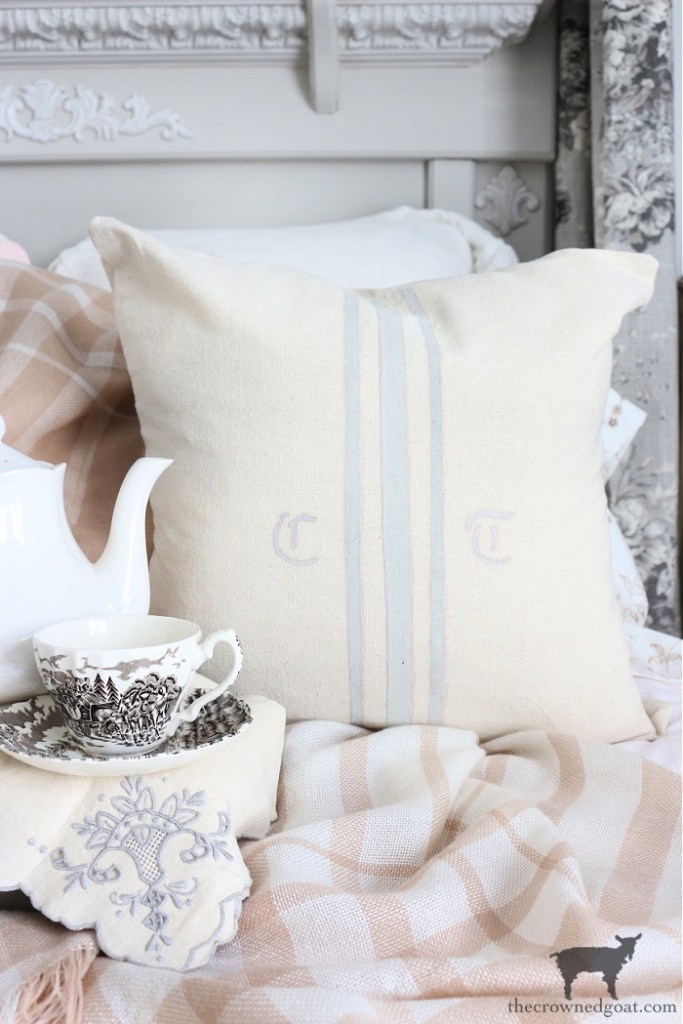
Finally, stuff your pillow covers and enjoy!


Decorating with DIY Grain Sack Pillow Covers…
What we love about these DIY grain sack pillow covers is that they’re relatively quick and easy to create and you can use them all over the house.
From the bench in your entry or breakfast nook, to the chairs in your dining room, on the couch in your living room, the bedroom, or even on your front porch – the design is simple yet impactful.

Bonus, you don’t have to have sewing, embroidery, or calligraphy skills either. Plus, you can customize them to the colors that work best with your decor!

I know a lot of us have been inspired by Marian over the years and I’m even more excited now that I’ve had a chance to read her new book. I really think you’re going to like it!
Feels Like Home is available for preorder now and will be coming to bookstores on October 12th. As part of the book launch, Marian is sharing bonus content including a preorder bonus original art download, as well as hosting multiple giveaways so be sure to follow along.

Let us know how Miss Mustard Seed has inspired you over the years! Until next time, I’ll see you on Instagram, Facebook and Pinterest.
Many blessings,
CoCo


I love this pillow cover and I love your cup and saucer, Coco. Miss Mustard Seed is amazing. Laura
I really appreciate it, Laura, thank you so much! Marian is definitely an inspiration to so many. I’ve actually met her once in person and she was super nice. Can’t wait for the book to come out! Hope you have the best week, CoCo
Your pillow covers turned out absolutely gorgeous… and that was a great tip for where to look for a deal on pillow covers. Personalized pillow covers are such a fabulous way to decorate so many different spaces!
Thanks so much, Heidi, I really appreciate it! They were fun to make and such a blast from the past with Miss Mustard Seed too. Hope your week is a fun one, CoCo
Another excellent post CoCo – I’m always SO inspired by your projects and your look! I’ll have to check out Miss Mustard Seed. Thanks for the introduction! Happy October!
You are so welcome, Barbara! I really think you’ll like her. She has a great European farmhouse vibe plus she puts together beautiful tablescapes too which I know you’ll appreciate! Hope your Fall season is off to a great start, CoCo
Very cool, CoCo!! I used to read Marian’s posts years ago, too. She, Courtney from French Country Cottage and Janet from Shabby Fufu, and another defunct blog were the four I read daily (which also helped me become a blogger!). So excited for Marian!!! Thanks for sharing and I love your DIY No Sew pillows. Happy to feature your post at this week’s Share Your Style #321 along with your Fall Front Porch Tour. <3
Enjoy your fall,
Hugs,
Barb 🙂
That is such a great group of ladies, Barb, and I’m so excited they helped you to become a blogger too. It’s been really fun to watch how much Marian has grown and changed over the years. I met her at Haven and she was super nice. I really think you’ll like her new book. It’s a good one! Hugs, CoCo