How to Personalize Pumpkins with Paint
Today, we’re sharing how to personalize pumpkins with paint!
Real pumpkins are not always easy to find this early in the season in Florida. So, whenever we get the chance to visit the pumpkin patch while at the cabin it feels like the biggest Fall treat!

I’m always amazed at the different sizes, colors, and varieties too. It’s such a delight to discover new ones.

Several years ago, I personalized pumpkins for our front porch with paint. It was so easy I thought I would share in case you’re looking for a fun way to bridge the gap between early Fall and Halloween.
It’s also a simple idea to use in lieu of carving a pumpkin if pumpkin guts gross you out or you live in a climate where carved pumpkins don’t last very long.

So put on a big pot of chili, break out the corn chips, snuggle up in your sweater and invite your pod over for an afternoon of creativity.

Here’s a look at how to personalize pumpkins with paint…
Personalized Painted Pumpkin Supplies:
- Pumpkin (I used a Face Pumpkin, but you can use any size pumpkin you want to be based on the design you’re planning)
- Paint in the color of your choice (we used General Finishes Milk Paint in Snow White)
- 2-inch brush for broad strokes
- Detail art brush kit for smaller strokes
- Craft paint in the color of your choice (we used black)
- Stencils or an image that can be easily transferred with graphite pencil, paper, and ballpoint pen
- Dropcloth or brown craft paper
Personalized Painted Pumpkin Steps:
Gather your supplies and use a drop cloth or brown craft paper to catch any messes. Make sure your pumpkin is clean and free from dirt and debris.

Then paint the entire pumpkin the color of your choice. I painted my pumpkin with General Finishes Milk Paint in Snow White.

This was after one coat of paint…

And this was after three…

Once the base coat of your pumpkin is completely dry, you can either use store-bought stencils to customize the pumpkin or you can use the easy transfer method if you have a specific image in mind.
I wanted to personalize my pumpkin with paint using a silhouette so I’m utilizing a combination of the easy transfer method and store-bought stencils.
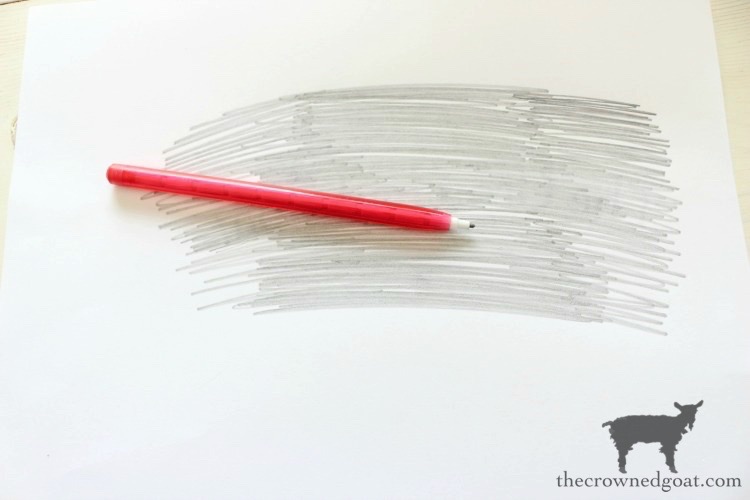
I printed out The Crowned Goat’s logo from my home computer, but you can print out an image you like. Just keep in mind you can’t use an image that is copyright protected.

Flip the image over and use a graphite pencil to shade over the entire image.
Then, flip the image back over, center on the pumpkin, and secure in place with tape.

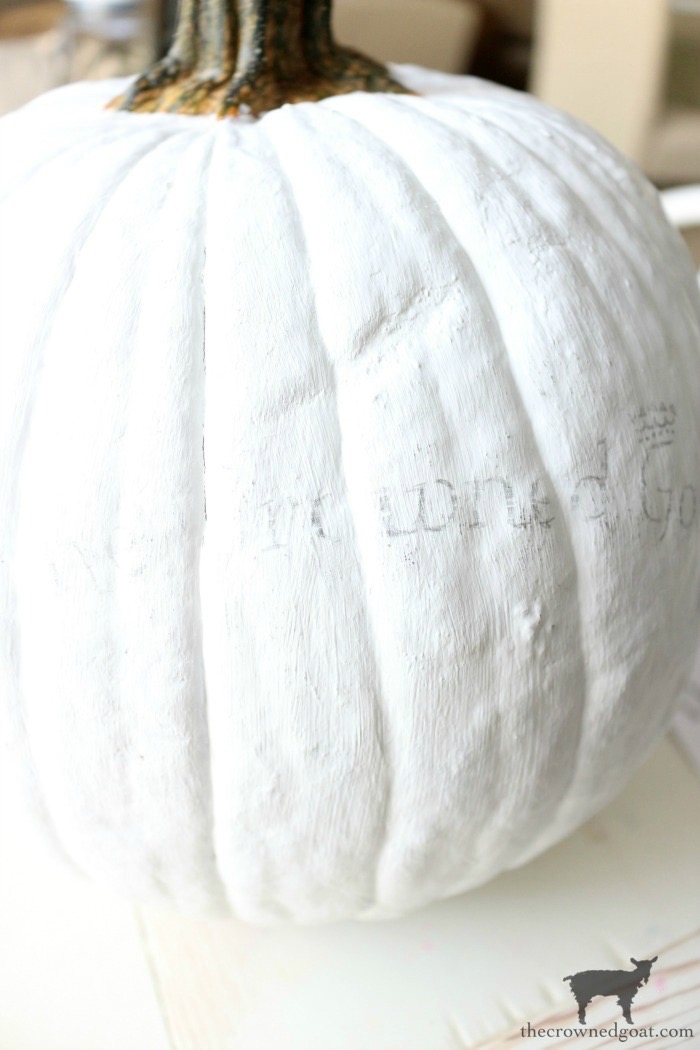
Using a ballpoint pen, outline the image you’re trying to transfer to the pumpkin.

The image transfer may be light, but it should look like this…
At this point, you can either, trace with a permanent marker like a Sharpie or you can use a fine detail art brush with a craft paint of your choice to outline and fill in the transferred image.

Fill in your graphics and letters. Make sure the paint or marker has completely dried before handling the pumpkin.

So Many Options…
Honestly, there are so many fun ways to personalize a painted pumpkin! You can do a silhouette of your kids, your dog, your house, your favorite number, your name, your hometown…the possibilities are endless.

Let us know how you plant to personalize a pumpkin with paint!

A Few Other Simple Fall Projects to Enjoy:
- DIY Brown and White Transferware Pumpkins
- Simple to Create Heirloom Pumpkins
- Fall Grapevine Wreath for Beginners
- Quick & Easy Fall Centerpiece
- Simple Stacked Pumpkin Topiary with Eucalyptus
Many blessings,
CoCo


I’ve never thought to do a CR-407 pumpkin before. I love it!
You could definitely rock this project with a CR-407 painted pumpkin, Cindy! A silhouette of one of your horses or one of the cows would be super cute too. Hug, CoCo
This is adorable! Love it !
Cindy
Thank you so much, Cindy, I really appreciate it! Hugs, CoCo
This pumpkin is so cute and unique. I live in northern Canada and we rarely get fresh pumpkins before October. I loved your photos of the pumpkin patch almost as much as your painted pumpkin.
Thank you, Leanna, they were definitely a lot of fun to make! I always see these beautiful pumpkins and pumpkin patches on Instagram and wished we live closer to a pumpkin patch too. Hopefully, we’ll both be picking them up and decorating them to our hearts’ content now that it’s October. Hope your day was a special one, CoCo
This is a fantastic idea. I never thought of this idea
Pinned
Thanks so much, Cindy, I really appreciate it. Hope you’re having the best week, CoCo
What a fun project! I’m always looking for ways to dress up our pumpkins without going through the arduous chore of carving and cleaning them! Thanks so much for the tips! Now to come up with some wording!
Thank you, Christine! We have several in our family that struggle with textures like slime and guts and truthfully even glitter. So, this project was an easy way to help them make their pumpkins festive without any fuss or drama 🙂 Hugs, CoCo
This pumpkin is adorable! I also use the reverse transfer method for many of my projects. Thanks for sharing at Vintage Charm. xo Kathleen
Thank you, Kathleen! I use that transfer method all the time too. It’s such a great way to give the most basic things a completely custom feel. Hugs, CoCo
I adore your Crowned Goat pumpkin CoCo. That has to be one of the cutest ideas I’ve seen this year! I’m excited to share your post this week on the Tuesday Turn About Link Party. Thanks so much for sharing it with us!
That’s so sweet of you, Michelle, I really appreciate it. It’s been quite a year so we’re happy to celebrate Fall any way possible. Sending you hugs and thank yous, CoCo
I love your Crowned Goat Pumpkin, CoCo. It’s such a unique way to decorate for Fall. Thank you for sharing at Party In Your PJ’s.
Thank you so much, Ann, I really appreciate it! Hope your week is full of Fall adventures, CoCo
This is such a fun idea! And so much better than dealing with the messy goo when carving pumpkins. I’m going to feature this at our Party in Your PJs tomorrow night on my Grandma Ideas site. Thanks so much for participating in our link party. You’re awesome!
Thank you so much, Nina, I really appreciate it. We have lots of different ages in our family and some are ok with the pumpkin guts but others are totally grossed out by them. Thankfully, this method allows them to be as creative as they want to be 🙂 Hugs and thank yous, CoCo
Super fun project! I do a similar transfer method, but I use charcoal pencils, it makes the transfer a bit darker. Thank you as always for sharing with us at Embracing Home and Family! Your posts are always excellent!
Thank you for the tip on the charcoal pencils, Jennifer, I will give them a try! It’s such an easy way to give the most basic things a custom look. Sending you hugs for a happy week, CoCo
I’m loving this so much CoCo! Too cute. Thank you for sharing with Charming Homes and Gardens.
You’re always so kind and encouraging, Kim, thank you so much! Hugs for a happy wee, CoCo
So adorably cute!!