DIY Fall Centerpiece
We’re sharing an easy DIY Fall Centerpiece idea today.
This centerpiece is something that can be easily made in just a few minutes using almost any container and supplies you can find at your local craft store.
It’s something you can use around the house as part of Fall vignettes and easily repurpose for Thanksgiving as well. Here’s a look at how to make a quick and easy DIY Fall Centerpiece.

An Easy DIY Fall Centerpiece…
DIY Fall Centerpiece Supplies:
- Centerpiece Container
- Floral Foam
- Spanish Moss
- Pumpkin (we used a paper mache pumpkin we already had on hand)
- Floral Picks (we used multiple floral picks we already had on hand)
DIY Fall Centerpiece Steps:
Choose a container and make sure it’s free from dirt and debris.
We’re using this vintage trophy urn.
But you could just as easily use a tarnished trophy, a galvanized bucket, a weathered box, or even a basket.

Depending on the depth of your container, you’ll need to build it up with floral foam.
Floral foam comes in multiple shapes and thicknesses from circular to square.
Continue to build up the container with floral foam, until you’ve almost reached the rim.

Then cover the floral foam with Spanish moss.

Next, start placing your floral picks into your DIY fall centerpiece.
We slightly bent the ends of our larger floral picks first so they would fit securely into the floral foam.
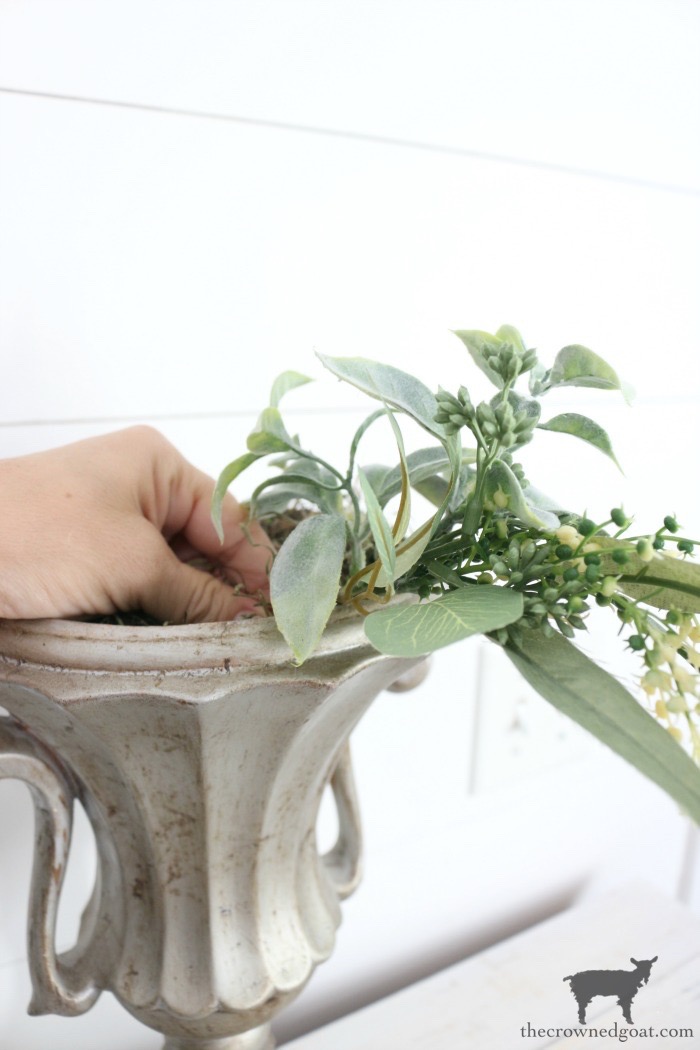
Place floral picks around your container forming a floral “base.”

Once your floral “base” is secure, gently lay your pumpkin on top.
We picked this paper mache pumpkin up on sale at Joann’s and left it natural, but you could easily paint it with craft paint too.
If you want this DIY Fall centerpiece to be permanent, you can always consider securing your pumpkin to the floral base with hot glue.
Just make sure to use caution and care as both the glue and glue gun will be hot.

After you have your pumpkin in place, continue layering additional floral picks to the centerpiece until you’ve achieved the look you desire.

Here’s our end result just using one type of floral picks.

Additional Fall Centerpiece Ideas…
Just to show you how you easily you can change this DIY Fall Centerpiece with floral picks, we also used roses,


cotton,


dried thistles and roses


and mini pumpkins.

We plan to use the mini pumpkin centerpiece on our table in the breakfast nook for Fall.

As you can see though if you added a few books and a few more pumpkins you could easily repurpose this DIY Fall centerpiece in a seasonal vignette.

I know we’re all incredibly busy this time of year.
But I hope this easy DIY Fall centerpiece shows you just how simple it can be to add seasonal decorations to your home.
Let us know if you try this DIY Fall Centerpiece. We love to see what you create!

A Few Other Fall Inspired Posts You Might Enjoy:
- 13 Easy Summer to Fall Decorating Ideas
- Fall Porch Decorating Ideas
- Embracing Fall Home Tour
- Easy Fall Tablescape Ideas
- Spice Cake Donuts with Cream Cheese Frosting
Until next time, I’ll see you on Instagram, Facebook and Pinterest.
Many blessings,
CoCo


This is beautiful, CoCo…pinning!
You’re so sweet, Linda, thank you! Hope your week has been a happy one, CoCo
Gorgeous!
I really appreciate it, Amber, thank you so much! Hugs, CoCo
Hi CoCo!
Lovely centerpiece! And that vintage trophy urn is beautiful! I love all five ways you styled it, but my favorite is the version with the dried thistles and pumpkins. You’re one of my features at Homestyle Gathering this week. Thanks so much for sharing! I hope to see you at the party!
>>> Kim
You’re the best, Kim, thank you! It was definitely fun to put this centerpiece together. You know I’m all about easy but I love having different options too, especially when it comes to holiday decorating 🙂 Hugs, CoCo
Super petty floral arrangements for fall.
Happy fall,
Kippi
I really appreciate it, Kippi, thank you so much! Hugs, CoCo
CoCo, this is inspiring. I often set a pumpkin atop an urn, but I’ve not imbellished with greens. I’m going to add that touch this year. Thanks! I pinned your image to my Inspired Autumn Board.
I’m so glad you like this idea, Sarah! I was super easy to make too. I appreciate you pinning as well. It’s always fun to dress the house up for the seasons. Hope you have the best day, CoCo
I know you thought this was too easy CoCo, but each version is absolutely stunning. I can’t choose just one, I love them all! Besides, I love easy when it comes to decorating. I wish I had access to the lovely trophies you share with us. I simply cannot find them in our area, I wish I could. I have searched high and low. My favorite floral arrangements are like this one, a more horizontal than vertical approach, reminds me of days of old. You rock!