The Complete Guide to Painting Kitchen Cabinets
A very big thank you to the great people at General Finishes for sponsoring this post and for helping to make my dream kitchen a reality!
A few weeks ago, I was discussing the kitchen makeover with my bestie, S. “Have you ever painted kitchen cabinets before?” she said. “No, but that doesn’t really matter, does it? I mean, I’ve painted hundreds of pieces of furniture.” I boasted. “It’s not the same,” she replied, “you don’t know this yet but this is about to be THE biggest project you’ve ever taken on.” I’m sure I mumbled something under my breath like “mmhmmm, ok” thinking, “I got this!” Not very long ago I had completely changed the look of my office in a mere 6 weeks and my confidence level was riding high. Oh, you guys, the lessons you learn when you’re wearing your pride pants!

Truthfully, I knew it was going to be a lot of work but I was up for the challenge. No matter what level of diy-ing you’re at, it helps to prep the days/nights before you’re going to start a project or makeover. This includes:
- shopping and purchasing supplies (complete supply list included at the end with affiliate links provided for your convenience);
- making sure the area you will be painting is free from pet hair, dirt and debris;
- using painters tape and drop cloths to protect areas you don’t want paint to get on;
- making sure you have the proper safety equipment such as eye googles and face respirator
- emptying or covering the contents of your cabinets to protect the contents from sanding dust;
- properly cleaning and prepping your cabinet surfaces with a 50/50 combination of water and denatured alcohol as per General Finishes (GF) recommendations or using a TSP and water solution which can also be used to clean cabinet surfaces.

I was so giddy with excitement I could hardly sleep and by 3:20 am, I was up and at ‘em sandpaper in hand. It took all of Friday to sand the cabinets, drawer fronts and drawers. I’m not sure sanding counts as a muscle building activity but for reals I was doing some serious sculpting. Here are a few things to keep in mind when you’re sanding…
- According to the General Finishes website (under Stain Blocker tab), if you are sanding over raw wood you should start with 120-grit then graduate to 220-grit sandpaper. If you are sanding over painted cabinets or an existing finish you should sand with 220-grit sandpaper or sanding pad. As you can see below, I used a 220-grit sanding block. Always make sure to check company websites and/or label instructions for the latest information prior to starting a project.
- Remember to sand with the grain of the wood
- Use a brush, compressed air and a damp (not wet) cloth to remove any excess sanding dust once you’re finished sanding.
- If you still see bits or streaks of shine on your cabinets, it means you need to sand over those areas again. The wood should look thirsty and/or dull not shiny.

If there’s one piece of advice I could give any level painter it would be to be make sure you educate yourself on the materials you’re using for each project. I’ve previously used General Finishes products to paint the bathroom cabinet but I would hardly call myself an expert in milk paint. Having access to the General Finishes Video Library and You Tube Channel to watch a variety of topics from milk paint to spray paint application helped to better understand what to expect during the cabinet painting process. You can check out the GF Cabinet Painting video:
By the time Saturday, rolled around I was totally over sanding. I see now what, S was talking about. When you’re used to using “no prep” products on a regular basis you get a little spoiled. You may feel like skipping over the sanding part completely but don’t. Yes, it takes a little extra time but the chances your cabinets will last longer makes the extra time worth it – especially if you’re painting your kitchen cabinets white!
Once the cleaning and sanding were finished it was time to get down to the business of priming. Our cabinets are solid maple which makes pink or red tannin bleed through highly likely. In an effort to combat this issue we used General Finishes Water Based Stain Blocker White Primer. If you’re not familiar with tannin bleed-through, General Finishes explained it like this when I was trying to choose the best products for this project… tannin-bleed through is actually a prevalent problem when refinishing cabinets as many cabinets are made out of oak, which is one of several wood species that is particularly prone to tannin bleed-through. Often a white pigmented shellac based stain blocking primer is enough to block tannins but unfortunately some bleed through is so powerful that it can work its way through countless coats of quality stain blocking primer. General Finishes created Stain Blocker for those particularly difficult projects. They go on to say…so far it has passed all of our tests on raw wood and existing finishes.
I can’t tell you what a complete relief it was to read that! If you’ve ever brought home a gorgeous piece of furniture that is cherry or mahogany with dreams of painting it white only to have it dry pink…you know exactly what I mean.
If you’ve never used General Finishes Stain Blocker before, here are a few things to consider:
- In my personal opinion, the consistency is thicker than other primers on the market. It doesn’t make it difficult to use but you need to make extra sure you’re applying the stain blocker with the proper tools and you stir thoroughly
- Use a high quality synthetic brush or short nap roller to apply
- Apply two coats allowing the recommended drying time between each coat
- Sand between coats using 220-grit to 320-grit sandpaper
- Use compressed air to remove any sanding dust prior to recoating
- My dad used a spray gun to spray the Stain Blocker onto the cabinet doors. Due to the consistency of the Stain Blocker we had to purchase/use a special nozzle. Make sure you’re educated on the proper nozzle for your specific paint/spray gun in advance of using the Stain Blocker. It will save you time!

We were in the middle of painting the cabinet doors when the rain started to fall. When it fell a few hours, I didn’t even blink. I just figured it was a typical Florida late summer shower. Then it rained all night. By the time we woke up, the rain was still falling, the coastal winds had drastically picked up and my mom was calling to see if we had seen the news…apparently, a tropical storm was on the way.
Undeterred, we plowed on. I assumed my dad was making as much progress as we were. I was up almost every day between 2 am and 5 am painting, sanding, removing sanding dust and recoating which had become my daily routine. I had a specific timeline in mind that I was bound and determined to keep despite the tropical weather. I had previously used General Finishes Milk Paint in Snow White on the bathroom cabinet so I knew the application process would be an easy one. If you’re new to GF Milk Paint here are a few things to keep in mind:
- GF Milk Paint has a creamy consistency and covers well
- Use an acrylic bristle brush, foam brush, paint pad applicator or sprayto apply
- Use two complete coats (in some spots I had to use three coats)
- Allow to dry properly before recoating
- As per the instructions I followed from the back of the GF Snow White paint I was using it stated sand between coats using 320-400 grit sandpaper or fine to extra fine sanding pads. However, through correspondence with General Finishes they suggest using a 220-grit sanding pad or 400 grit sandpaper to sand between coats of milk paint. Make sure to check the company website prior to starting your project for the latest application information.
- Remove sanding dust with compressed air

About an hour into my second coat of Milk Paint I got a call from my dad. The entire time I was rocking and rolling in a controlled painting environment, he was an hour away in the workshop portion of his garage. He said the high humidity had altered the drying time by 5 or 6 hours and he wanted to let me know he would be off schedule. This is not an uncommon experience so keep that in mind prior to painting. Before he hung up, he added, “You guys have your hurricane kits ready, right? Hermine is on the way.”
I knew then I had to reprioritize my thoughts about the kitchen makeover. The focus was no longer about dreamy Snow White cabinets and a Seagull Gray island but in making sure we were all safe.
Once the power was restored and the storm damage assessed, we were able to complete paint touch ups before adding a few layers of General Finishes High Performance Top Coat. This topcoat is ah-mazing! I’m usually a furniture paste wax kind of girl but this stuff is award winning, no playing. Here are a few things to keep in mind when using this topcoat:
- In the can this top coat looks, milky white but it dries clear.
- Apply using foam brush, pad applicator or spray gun in smooth, even strokes with the grain
- Apply at least 3-4 coats for added durability
- Sand between coats using 320 to 400-grit sandpaper
- Remove sanding dust with compressed air
- Allow to dry 2-3 hours prior to recoating
- Light use cure time (7 to 10 days) and heavy use cure time (21 days) under ideal conditions

Let me just tell you guys, I was beyond excited to pick these cabinet doors and drawer fronts up from my dad. I’m pretty sure he was excited to see me pick them up too he he. He’s a total a champ to help me complete this project despite the weather delays and I am forever grateful.

We still have a few things to finish before I can show you the kitchen reveal but here’s a sneak peek at how the cabinets came together after the cabinet hardware was secured and installed. This is how the kitchen looked before…

and after…

I know, right? It’s drastic! I just can’t get over it.
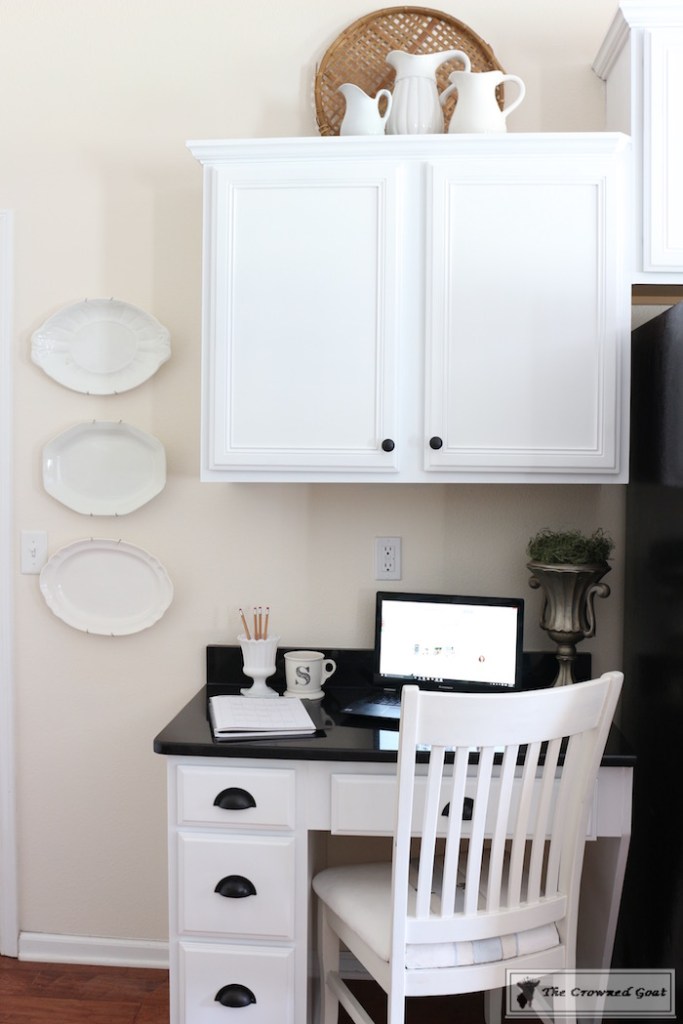
I’m still trying to decide how to use this space. The outlet drives me bananas but the desk is functional so we’ll see how it comes together over the next few days. If you guys have any idea how to cover up or decorate around the outlet let me know. Here’s a look at the desk area before…

and after….
Thank you again to General Finishes for sponsoring this post and for helping me to make informed product decisions. All thoughts and opinions are my own unless otherwise noted. Thank you to my bestie S and my dad for being so generous with their time, skills and best gifts. I know this was a long one, you guys are fabulous!
Here’s a look at the supplies list we used… Affiliate links have been provided for your convenience. You can read our disclosure policy here
1 Quart General Finishes Water Based Stain Blocker
1 Quart General Finishes Water Based Milk Paint in Snow White
1 Quart General Finishes Water Based High Performance Top Coat
Foam roller
Foam Roller Tray
Painters Tape
120-220 grit sandpaper (multiple sheets or sanding block)
320 grit sandpaper (multiple sheets or sanding block)
Shop Towels
Cleaning solution (a combination of 50/50 denatured alcohol and water OR TSP)
Screw driver or power drill
Paint key
See you back here tomorrow. I can’t believe it’s already Friday! I’ll share all of my favorite things from around the web this week. Until then, I’ll see you Instagram, Facebook and Pinterest.
Many blessings,
CoCo


Wow Coco – this is a great comprehensive tutorial! Thanks so very much for sharing your expertise and experience. We can’t wait to see the finished kitchen. We are sure it really is a dream kitchen!
You girls are the best cheerleaders! It was way more involved than I ever expected so it’s exciting to see the kitchen almost finished. Hugs, CoCo
Wow, it does look terrific Coco, I love white cabinets – they’re classic. Would you be able to share how much your project cost? Just wondering the difference between new cabinets vs. painting. Have a great day 🙂
Nice Job Coco you Ben working a lot your almo done !!!!!!
Blessing
Isora
XO
Thank you, Isora! It’s exciting to see the kitchen finally coming together. Have a fabulous day, CoCo
The cabinets are beautiful. Great job !!! I suggest a picture over the outlet above the desk – something easy to remove when
you need the outlet.
That is a great idea, Martha, thank you so much I’ll be on the hunt 🙂 Hope your day is a special one, CoCo
An extraordinary detailed tutorial with specific instructions. Very thorough. I have pinned this and plan on following it with even your specific products as I am about to redo my kitchen sometime in the next few months. Thank you so much. Your is looking beautiful.
Thank you so much, Linda! It was so much more work than I could have ever imagined but we are excited about the way the kitchen has come together. Good luck with your upcoming kitchen makeover. I know it will be fabulous. Hugs, CoCo