How to Customize a Kitchen Island on a Budget
As I shared yesterday, we’re making great progress on the kitchen makeover. While it feels like we’ve been working on this project for about a month now the calendar says we’ve only been working the kitchen for a week and a half. Crazy, right?
The base of the cabinets have all been primed, painted and sealed. My dad used his paint sprayer to spray the cabinets doors and drawer fronts which saved us so much time. It also allowed us a bit of extra time to think about how to give the kitchen island a more custom feel especially with all the layers of white.
Practically the entire summer we’ve gone back and forth trying to decide what kind of wall treatments we wanted to use in the house. Do we want wainscoting, shiplap, wall paper, stenciled walls, bead board or even reclaimed barn wood? At times, it felt like we had too many choices because every day we would go back and forth. We were finally able to make a definitive decision when we asked ourselves one simple question…what element could we see being repeated throughout the entire house? Wainscoting for the win!
Using actual wainscoting in the kitchen seemed a bit too formal for this little cottage but we wanted the style represented on the kitchen island somehow. After a bit of research, we chose to install picture frame moulding to the island. It was an inexpensive way to add an architectural element to the kitchen while still respecting our laidback lifestyle. Here’s a look at how we gave the kitchen island a custom look on a budget….(Affiliate links have been added for your convenience. You can find our full disclosure policy here)
Originally the kitchen island looked like this….

The size of the island is definitely a blessing. We use it for meal prep and baking all of the time. Once we decided to paint the cabinets white, we knew we wanted to give the island a complementary look and painted it in General Finishes Seagull Gray. You can read about how we painted the kitchen island here.

The island would have been completely fine just painted in Seagull Gray but we wanted to give it a custom feel. We purchased 4 picture frame moulding at a local hardware store. You can find similar here. The frames were already white when we bought them but we wanted our frames to be the same color white as the in the kitchen cabinets General Finishes, Snow White. We painted all of frames prior to installing them on the island. We also used General Finishes High Performance Top Coat on each painted frame just to give them extra durability.

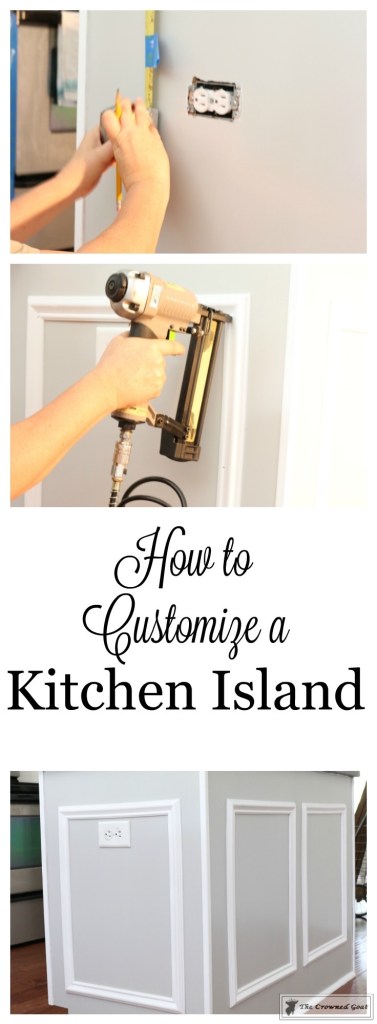
If you’re putting up frames on multiple sides of your kitchen island, you’ll want to make sure to measure and mark each frame. Be sure to take into account any electrical outlets that may be on your island when you’re measuring.

We used a pneumatic nail gun to secure each frame in place,

then used a bit of paintable wood putty to fill in any nail holes. Not all wood putty is paintable so keep that in mind when you’re buying supplies.

After the frames were secured and nailed into place we decided to frame out some of the trim on the front of the cabinet with Snow White just to keep the look of the kitchen island consistent from front to back.

Here’s a look at the back…

the front…

and the side…

Picture frame moulding comes in a variety of sizes and price points. For about $50 we were able to give a custom look to the kitchen island which was easy to install and completely budget friendly.
See you guys back here tomorrow. We’ve picked the cabinet doors up from my dad and they’re ready to hang so I’ll share another progress update. Until then, I’ll see you Instagram, Facebook and Pinterest.
Many blessings,
CoCo


It’s looking great Coco! The addition of the picture frame makes such a huge difference. It’s going to be gorgeous when finished.
Nancy
Thank you, Nancy! I wanted to find a way to make the island look special but to also showcase a classic style. This combo definitely fits the bill. Big hugs, CoCo
Love all of your choices for this beautiful kitchen island! The color, the picture frame trim and your finishes. Can’t wait to see what tomorrow brings! Love following along with your great progress!
Thanks so much ladies! I know we’ll probably never do this again so I knew I had to get it right from the beginning. The seagull gray is a beautiful color you two would love. Sending you hugs, CoCo
Looks awesome! Looking forward to seeing the finished kitchen!
I appreciate you, Betty, thank you so much! All the other products have shipped so fingers crossesd it wll be some time next week 🙂 Big hugs, CoCo