Creating a Bench from Dining Chairs
A few weeks ago, I got a phone call….
“You’re never going to believe what I just found,” the voice on the other end said.
When someone is talking with this much excitement my mind immediately thinks about pieces of rare ironstone, chippy French farmhouse furniture that has been shipped from Europe or finding jewelry marked Tiffany & Co. at the bottom of crusty box you swore was nothing but junk.
So, with anticipation, I replied, “Tell me what you found.”
“I found two chairs. They’re really pretty and in great shape. But one arm is off the inside of each chair.”
It took me a hot minute to visual what this might actually look like. I guess I took too long because she said, “You can totally make this a bench. I know you can.”
This call was from River Ranch and I trusted the source completely. Apparently one of the neighbors had been on Pinterest and was trying to turn two dining room chairs into a bench. Well, the neighbor had either lost interest or didn’t have the skills to make it happen because the chairs needed a new home. My River Ranch client called to say they had already been loaded into the truck and were headed my way.
It was sweet she had thought of me and had complete confidence I could pull it off. Honestly, I had no idea what to even expect. I mean, essentially, she was bringing home two broken chairs. Thankfully, my bestie S is always willing to help out in a pinch. Here’s a look at how the bench came together…

This is how the chairs looked when we picked them up. You can clearly see where the neighbor was going with this one. The inside arms had both already been removed so we used wood filler (make sure you chose a wood filler you can paint over) to fill in the holes where the arms had been.


I painted the chairs using my DIY chalk like paint recipe in Glidden’s Granite Gray. If this color looks familiar, it’s the same color as I used on the bench in the entry.

A few days later, S used a chop saw to cut pieces of 2 x 4.

The pieces were then joined to the apron of the chairs and secured in place with screws. This became the base of the bench.

I wanted the bench to have a farmhouse feel so I asked S to make it look like it had been put together with wide planks as opposed to one solid piece of wood. The back plank was secured in place first…

Then the second plank was secured in place with screws. This became the seat of the bench.

S used a palm sander with 80-grit, then graduated up to 220-grit sandaper to sand the wood smooth and to also round off all of the edges.

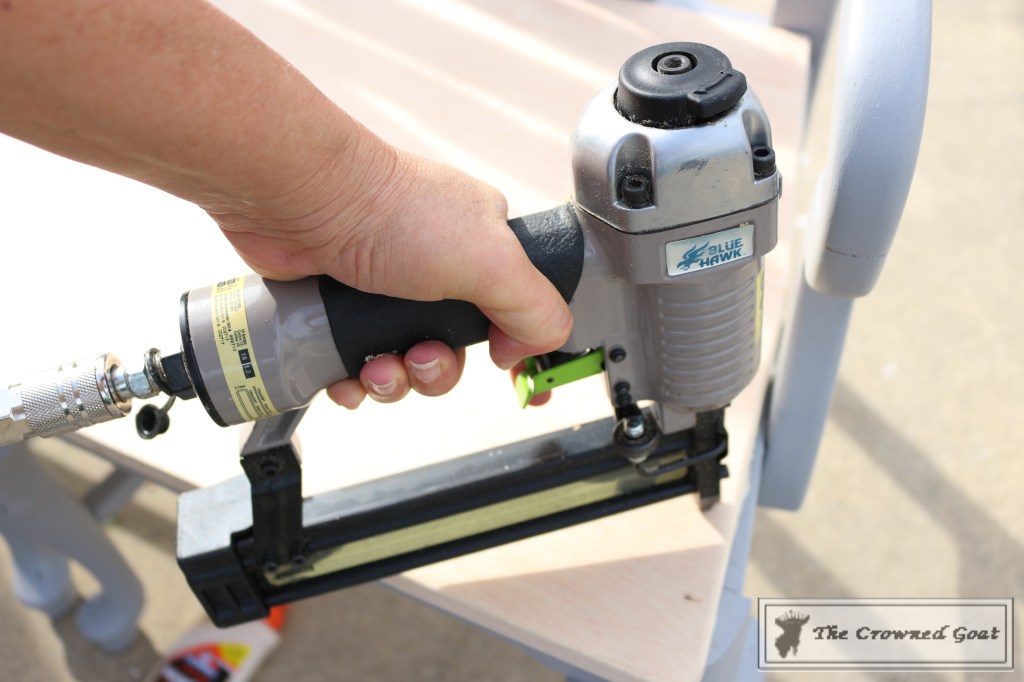
We also used a nail gun to help reinforce the planks to the chair frame.
At this point the bench was set, here’s a look before I started painting the seat.


It took me 3 thin coats of DIY chalk like paint in Bistro White to get good coverage.


This piece has a few natural nicks here and there so I decided not to distress the bench any further. I sealed with furniture paste wax and buffed with a lint free cloth. I delivered this piece to my booth at The Pickers Market before I left for Loblolly Manor and it fits right in. I think customers are going to be excited about it too.


I’m always thankful when people spot something they think I will love. It really takes so many people to keep this blog, the booth business and private pay client projects all going at the same time.

A big thank you to S for making this happen while I had my hands full with the Summer Inspired Tablescape for Kirklands.
I hope you guys all have a safe and happy weekend. We have a great week coming up next week. I’ve been spending a lot of time at Loblolly Manor this week so I’ll share everything we’ve been up to on Monday. Until then, I’ll see you on Facebook, Pinterest and on Instagram over the weekend.
Many blessings,
CoCo


CoCo and S – this bench is fantastic! Love the details of how you put it together…we might be able to try this in the future. The color finishes are just beautiful. Well done! Cheers to a great weekend!
We appreciate you ladies! It was fun to put together and I was so excited we were able to save these chairs from the landfill. Can’t wait to see how you guys build your bench too. Hugs, CoCo