DIY Console Table Base
Today, we’re sharing the painted hutch and DIY console table base we created for the Crowned Goat Cottage as part of Week 5 of the One Room Challenge!
![]()
As always, a big shout out and thank you to the One Room Challenge and media partner Better Homes and Gardens for sponsoring this bi-annual inspirational event held each Spring and Fall.

If you’re new here and need to catch up, you can read all about the:
- Shed Makeover: Trusses and Floors in Week 1
- Painted Thrifted Table and Chairs in Week 2
- Painted Hutch in New Concrete in Week 3
- A Budget Friendly Shed Workstation in Week 4
Sometimes Things Don’t Work Out
Believe it or not, my original plan was to put the painted hutch on top of the budget-friendly workstation.
In fact, we actually tried it but it was so “off” I didn’t even bother to grab a photo.

Yikes…
Sometimes things don’t turn out in real life like they do in your head and Week 4 to Week 5 of the ORC has a way of proving that theory every.single.time.

Once I realized my original plan wasn’t going to work out, I knew I had to pivot pretty quickly.
No pressure, right?
The painted hutch is over 4 feet tall which didn’t sound too bad until I realized I had to work around the base of the trusses.
While the overall height of the shed’s ceiling is around 8 feet, it meant I had to find a table that was no more than 2-3 high since the base of the trusses was a little over 6 feet.

DIY on a Budget
I’ve never shied away from sharing we blew the bulk of our budget early on in this project with things that will likely never been seen.
Things like insulation, an extra seal barrier against pests, drywall panels, buying tools we didn’t know we needed, surprising delivery fees, and an air conditioner unit with a special dehumidifier function we never expected to use.
I share this because on tv (and sometimes social) it looks like unforeseen expenses are no big deal.
But if you’re working on a budget, it can be a very big deal.
And more times than not you have to compromise on things you really want and in some cases, give up on specific ideas altogether.
I don’t say this to scare you in any way. Budget-friendly makeovers are some of my all-time favorite makeovers to work on.
They allow you the freedom to be extra creative because no idea is too wild to consider. And those are usually the projects that turn out to be the most exciting.
After taking all the necessary measurements and shopping the house, I only had 2 tables available.
Thankfully, the table we had been using behind the couch wound up to be a great fit.
DIY Console Table Base
Way, way, way back in the day when I was a vendor at several antique stores, my bestie S and I built the table as a base for the very painted hutch we made over in Week 3.

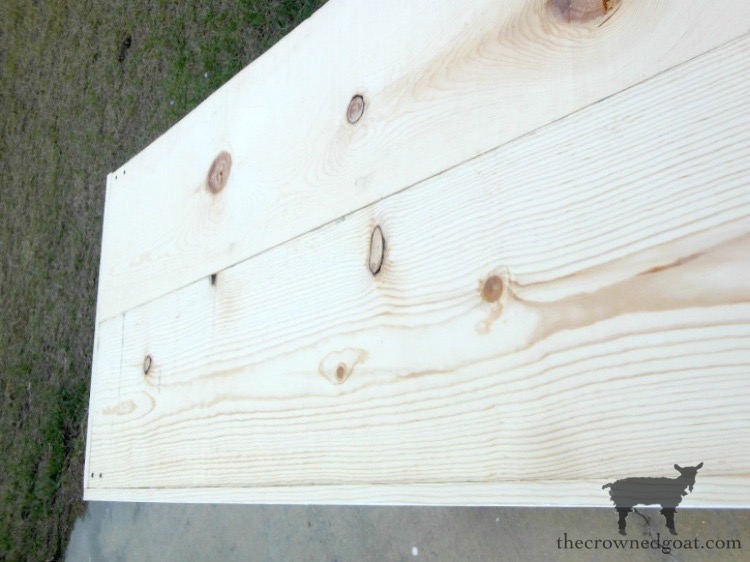
It was one of the first tables we’d ever attempted to make. And after a few trips to Lowes the table went from this…

to this…
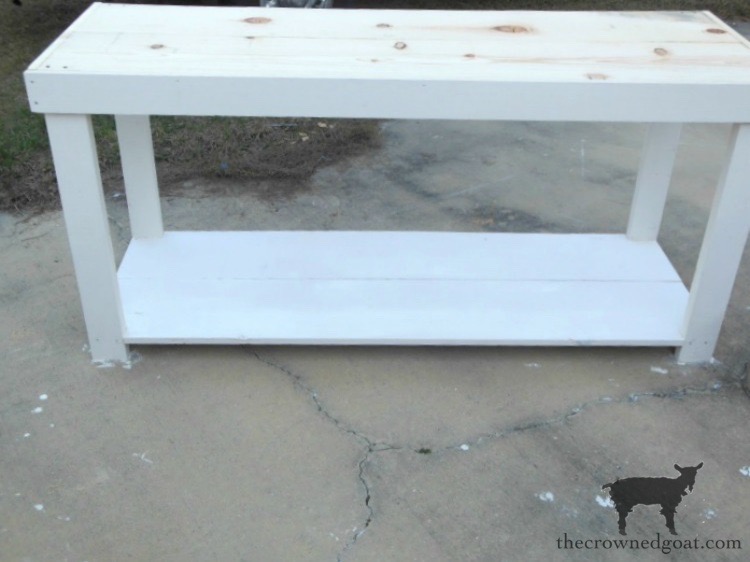
Since we were starting out with new wood and I wanted the top of the table to have a weathered look,
I used one coat of Annie Sloan Chalk Paint in French Linen.

Then I painted the apron of the table in Valspar’s New Concrete which is the same color as the shell of the hutch and the floor of the shed.

The legs are painted in Valspar’s Du Jour which is the same color as the walls of the shed.

Truthfully, I had never considered using the table out in the shed because I loved it behind the couch.
But now that I see these two pieces together again, I’m in love all over…

Things to Consider
I still need to decide how to style it all. The shelves are such different sizes it makes it kind of tricky.
And I’m thinking about adding a skirt to the bottom of the console table base as well.
Right now I have the desk in there, the DIY office work island, and the work station.
I don’t want it to look like a collection of work tables though, you know?

Lots to think about as we head to the finale next week.
Until next time, I’ll see you on Instagram, Facebook and Pinterest.Many blessings,
CoCo


Coco,
The table looks great with the hutch top. We all have been there with budgets. It can be difficult but in the end usually works out.
Looking forward to seeing the skirt which will be charming and styling.
Cindy
Thank you, Cindy! I’m excited about trying the skirt too. We had a major issue with the lights so fingers crossed I’ll be able to pull it all off. I might be drinking lots of extra coffee this weekend 🙂 Big hugs and thank you for all your sweet support, CoCo
Those two pieces really do look fabulous together. Thank you so much for sharing this journey with us, I love getting a behind the scenes glimpse of your thought process!
Thank you for being such a fantastic cheerleader, Heidi! I can’t tell you how much it’s meant to me. It’s helped me get through some crazy weeks 🙂 Big hugs and thank yous, CoCo
This hutch turned out great!I love the paint color.
Thanks so much, Josiah, I really appreciate it!
It’s really coming along and looking great! I can’t wait to see how you finish it out.
Side note – from one Florida girl to another…you’re a brave woman to tackle this project in the heat!
Oh my gosh, Emily, thank you! Working through the heat and all the rain from the hurricanes has been totally bananas. I’m so thankful to be almost finished but I swear I will never tackle a project of this magnitude during the late summer months again 🙂 Fingers crossed the temps will be settling down soon as we near the finish line. Thanks for all your encouragement along the way, CoCo
What a great combo! And love the paint colors. Thanks for sharing at Vintage Charm! xo Kathleen
I really appreciate it, Kathleen, thank you so much! Big hugs, CoCo
This is going to be so amazing! I love the legs on the work table! Looking forward to the big reveal! The process is so fun to watch!
It’s been a wild ride trying to finish this office makeover over the summer and during hurricane season. I’m so thankful to almost have it all behind me. Thanks for being such a great cheerleader, CoCo