How to Give New Pots an Aged Patina
Today, I want to share with you how to give new pots an aged patina. We recently moved “The Lady of the House” painting over the mantel and within minutes of doing that I decided we needed flank the painting with urns and topiaries.
I looked everywhere for a set of inexpensive urns. And when I say everywhere, I mean everywhere. I wasn’t even opposed to using urns that were made for the outdoors on the mantel. I had almost given up when my bestie S sent me a picture of the “perfect urns.”
To be completely honest, they weren’t exactly what I had pictured in my head. The urns I envisioned had more of a footed look but once I got them up on the mantle I realized my search was over. The only thing I didn’t love was how new and shiny they looked. I knew that was an easy change though.
It was fairly simple to create the look of patina with a quick coat of paint and a few layers of wax, let me show you how…

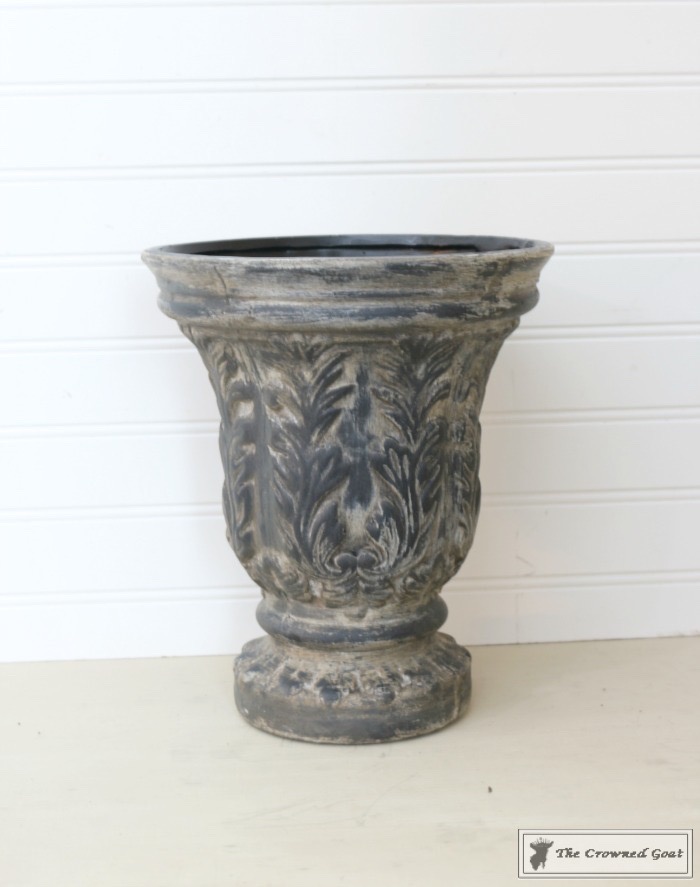
This was the new urn we found at Hobby Lobby. It was around $25.

This urn is made from what feels like some sort of ceramic so I decided to use an inexpensive chip brush and Annie Sloan Chalk Paint in Pure White.

I like chalk paint for projects like these because there’s no prep which makes it nice. You don’t have to be super careful about the way you’re painting the piece either. The more imperfect the painting the better.

Allow to dry for just a few minutes.

Once the paint has dried a few minutes into the nooks and crannies, wipe away the excess chalk paint with a damp cloth making sure to highlight all the etched and embossed details.

You don’t want the cloth to be wet only damp.

Next, I used wax brush to brush Annie Sloan Dark Paste Wax onto the entire pot.

Again, you want to layer the wax over the paint and really get into all the different nooks and crannies.

You can also use a fine grade piece of steel wool like 000 and lightly sand over the raised details to help really bring out the extra details especially if they are raised like these details are.

Keep layering until you get as much or as little patina as you want.

This entire process didn’t take very long at all, it honestly just depends how many layers you want to add to the piece you’re working on. I even added a bit of black wax to this mix too.
We’re using these on the mantels but you could just as easily use these pots in the kitchen to hold wooden spoons, to hold a plant or in an easy vignette on a bookshelf or tabletop too. Honestly, they’re super versatile!

Let us know if you try this technique and give your new pots an aged patina too!
Until next time, I’ll see you on Instagram, Facebook and Pinterest.
Many blessings,
CoCo


Hey CoCo – Love the new look! It’s amazing what a little patina can do for a new piece. And you know that we love the “Lady of the House”! She deserves to be front and center of your home on the mantel.She looks great holding court!