Quick & Easy 5 Minute Topiary
Today, we’re sharing how to make a quick & easy 5 minute topiary!
This is another one of those projects that is so simple, it almost doesn’t even need a tutorial. But I know we’re all looking for ways to dress up our homes with things we already have on hand that don’t take a lot time.
And this project is definitely one of those projects.

If there’s one thing we enjoy no matter what the season, it’s having a lot of greenery and flowers around the house. While my preference would be bouquets of fresh flowers in every room, we don’t live remotely close to a flower market and our allergies can be pretty severe at times.
So, we’ve had to learn to embrace a mix of real and faux flowers and greenery.

That said, faux flowers can get kind of pricey. Especially, if you use a lot of them throughout the house.
Thankfully, layering a home with lots of greenery then adding a few pops of color with flowers here and there is not only budget friendly, it’s also really pretty too.

One of my favorite ways to display greenery is with topiaries. I’ve been in love with them for as long as I can remember!
Faux topiaries are super easy to make, and they can instantly add a bit of cozy to any home. In fact, this post on How to Make a Simple Herb Topiary has been one of our most popular posts ever.
As simple as the herb topiary is to make though, I found an even faster way to create one. As in 5 minutes fast.

Here’s a look at how to make a quick & easy 5 minute topiary…
Quick & Easy 5 Minute Topiary Supplies:
- Urn or vessel
- Floral foam or Styrofoam
- Rocks
- Faux Lavender Ball
- Wooden Dowel or Stick
- Moss
- Tarp (optional but just a heads up working with moss is pretty messy)
Quick & Easy 5 Minute Topiary Steps:
Gather your supplies and lay a tarp down over your workstation, if desired.

Place floral foam or a piece of styrofoam into your container and make sure it is secure. This urn is a thrifted find and already came with a foam insert.
Insert a wooden dowel or use a stick from your yard into the center of the urn.

If you’re using a stick from your yard you need to make sure it is completely clean and free from pests.

Add rocks around the base of the stick to give it some weight and to help keep the stick from moving.

This is the base of your quick and easy 5 minute topiary.

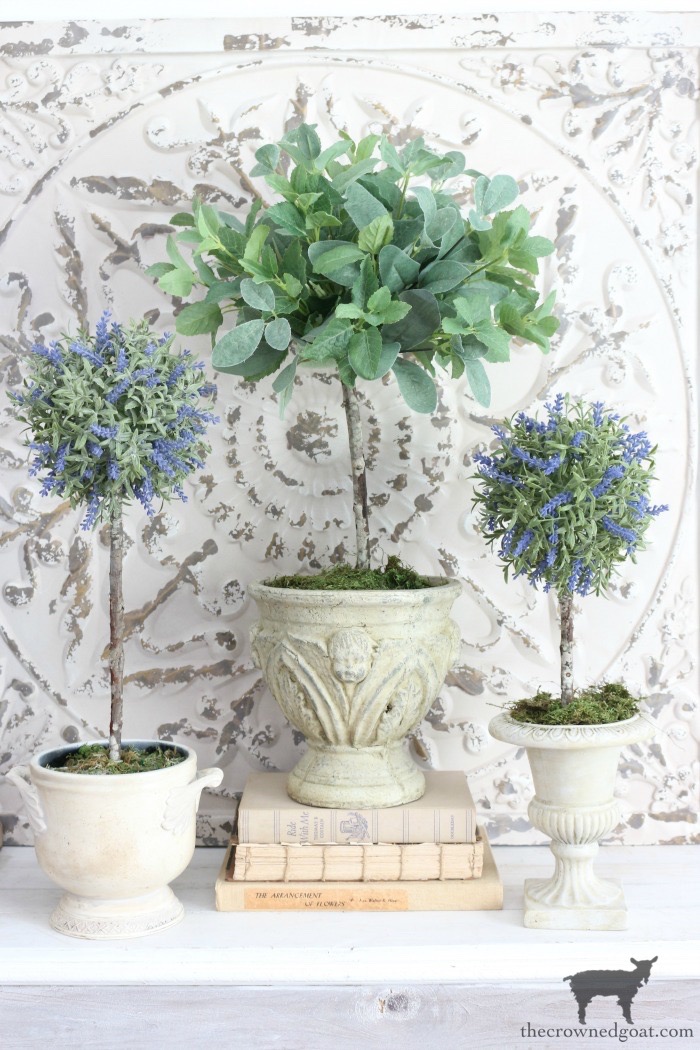
Once the rocks and the stick are in place, secure a faux lavender ball to the top of the stick. We found this one at Hobby Lobby over a month ago in the faux succulent and fruit section.

It has a foam center which made it really easy to gently press the foam into the topiary stick.

Next, add moss around the bottom of the topiary to cover the rocks.

Step back and enjoy your fabulous quick & easy 5 minute topiary! This is how it would look with Spanish moss…

And this is how it would look with preserved moss…

A Topiary & Thrifted Container Makeover:
Because these were so easy to make, I decided to spray another thrifted container

in Dover White which is a creamy white.

Then I added a bit of dark paste wax.
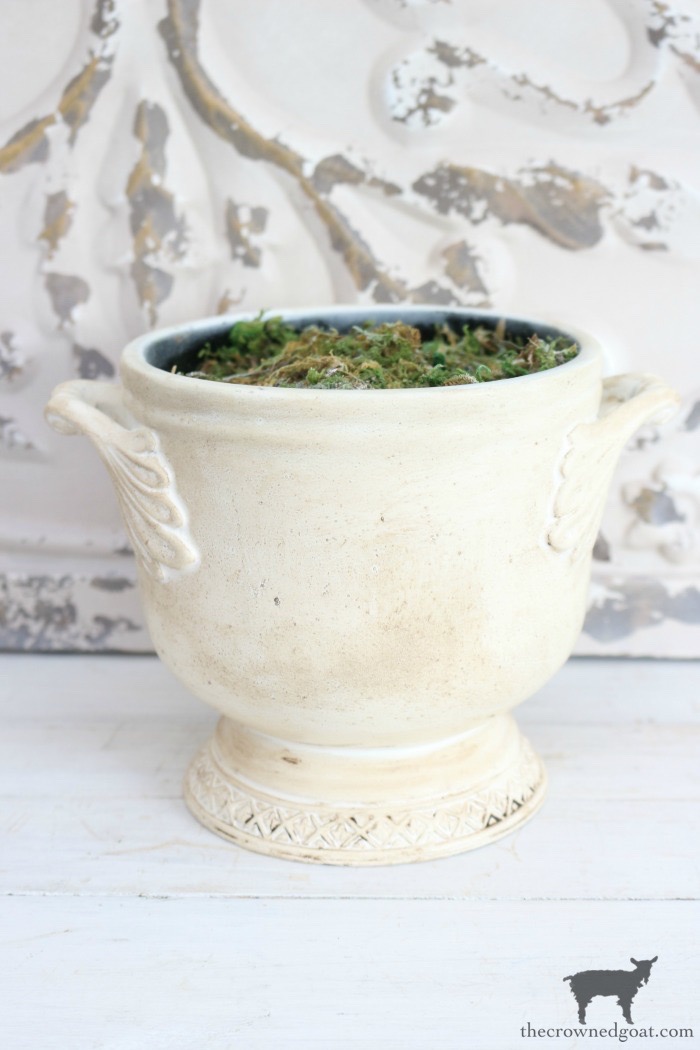
Followed by a dry brush of chalky paint in Primitive to highlight the embellishments on the thrifted container.

After following all the steps listed above, I had another quick and easy 5 minute topiary finished in no time!
Let us know if you decide to try this quick & easy 5 minute topiary or some version of it at your house too.
As soon as we’re able to get out and about again, I’d love to try a double boxwood style topiary as well.

A Few Other Quick & Easy Projects You Might Enjoy:
- 18 Quick & Easy Spring DIY Projects
- The Easiest Way to Make Moss Placemats
- Simple Lavender Topiary & Summer Celebration Blog Hop
- Stacked Pumpkin Topiary with Eucalyptus
- Spray Painting 101: Simple Tips & Tricks
Many blessings,
CoCo


Great tutorial. I made some topiaries a year or so ago and they are still one of my favorite easy DIY’s. I move them around from place to place and they look great everywhere! Hope you had a wonderful Easter!
That’s so awesome Cindy! I’m definitely finding that add more greenery than flowers not only helps to keep the budget in check but it also helps when the seasons are changing and there is a decorating lull 🙂 Sending you hugs and hoping you and your family have had a happy week, CoCo
I love this topiary! It’s so elegant. And of course I love a quick project, too! The thrifted urn is so pretty! I also love the container you painted with the paste wax. I’d love to see a tutorial on how to do that. It’s beautiful! Wishing you a wonderful week!
Thank you so much, Michelle! I’m all about trying to find quick, easy and budget-friendly ways to decorate. These topiaries were super simple to make. Once we’re able to get out and about again, I’ll be on the hunt for more containers so I can share the wax technique 🙂 Hope you’ve had a great week, CoCo
I’ve gotten most of mine at thrift stores but I did make a boxwood one years ago. I love your idea! Thanks for sharing at Vintage Charm Party! xo Kathleen
That’s awesome, Kathleen. I miss going to the thrift stores so much! Hopefully, we’ll be back at it soon. Hugs for a happy week, CoCo
I really enjoyed your topiaries! I smiled when you mentioned working on a tarp. I upcycle stryrofoam from packaging and cut it with my serrated knife in/over the kitchen sink. Ditto for ripping off a chunk of Spanish moss. At least all the mess is in the sink and is easily swept up to go into my compost bucket on the side of the sink. If my arrangement if fairly permanent, I drizzle Tacky Glue on the foam so the moss sticks; I also tuck the moss into the edges of the container with a steak knife. We have a new Hobby Lobby in the next town; as soon as the C virus is done, I am going to have such a good time; meanwhile, I am paying down my credit cards!!!
Such sweet words and helpful tips, Kathy, thank you! I will definitely try them the next time I’m working with moss or making topiaries. I know they will help cut down on the mess 🙂 I’m with you, I will be so excited when we can get out and about again. We’ve been on “safer at home orders” since March 9th and I miss being the freedom of being able to walk around Hobby Lobby too. It’s smart of you to pay down your credit cards as well. We always say every little bit helps and it all adds up! Hope your weekend was a fun one and your week is blessed, CoCo
Love these! I kill every plant I get, without fail. I couldn’t kill these!! Great idea!
Thanks so much, Niki! I feel the same way about our plants. The ones on the porches do really well but the ones inside not so much. Give me quick and easy to maintain any day of the week ? Hugs, CoCo
Adore this tutorial. It was the reminder of making something in 5 min to make a subtle change and lift your spirits. Would love for you to post at Funtastic Friday Lin Party.
So glad you like this idea, Michele, thank you! It was so easy to make it almost doesn’t even need a tutorial but as my Mom always says, “It’s good to have a visual.” Thanks so much for the invite, I’ll see you at the link party tomorrow. All the best, CoCo
CoCo, I do love topiaries and a quick stash check show I have everything but the lavender ball. That should be easy to find at Hobby Lobby. This is a wonderful diy. I always learn something creative when visiting your blog 🙂
Thanks for adding it the the FWF link party.
Such a sweet and kind compliment, Rachelle, thank you! I really appreciate it. Hugs, CoCo